
- About Vue.js
- Create Your Vue + Go App
- Add Vuetify
- Add Authentication to Your Vue App with Okta
- Create Your Vue App Routes
- Create Vue Components
- Create a REST API with Go
- Add the Go Backend
- Define Go HTTP Handlers
- Verify JSON Web Tokens (JWTs) with Go
- Define Your Go REST API Entry Point
- Run the Go +Vue SPA
- Learn More About Go and Vue
This article was originally published on the Okta developer blog. Thank you for supporting the partners who make SitePoint possible.
Single-Page Applications (SPAs) improve user experience by offering rich UI interactions, fast feedback, and the relief of knowing you don’t need to download and install a traditional application. Browsers are now operating systems and websites are apps. While a SPA isn’t always the answer, for apps that rely on snappy user interaction they are increasingly common.
To the end user, a well-designed SPA feels like rainbows and unicorns. From the developer perspective, reality can be much the opposite. Tough problems long-since solved on the backend like authentication, routing, state management, data binding, and more become time-consuming frontend challenges. Luckily for us, JavaScript frameworks like Vue, React, and Angular exist to help us craft powerful applications and focus more of our time on critical functionality and not reinventing the wheel.
About Vue.js
Who better to describe Vue than its creator, Evan You?
Vue (pronounced
/vjuː/, like view) is a progressive framework for building user interfaces. It is designed from the ground up to be incrementally adoptable, and can easily scale between a library and a framework depending on different use cases. It consists of an approachable core library that focuses on the view layer only, and an ecosystem of supporting libraries that helps you tackle complexity in large Single-Page Applications.
Here are some of Vue’s benefits:
- A gentle learning curve and low barrier to entry
- Provides the ability to bootstrap your app with
vue-cli,saving you the hassle of setting up webpack and complex build pipelines - Explosive community growth! Vue now has more stars on GitHub than React and Angular
- It’s flexible enough to adopt at a reasonable pace, component by component
Create Your Vue + Go App
In this tutorial, you will create a single-page application that shows love to open source projects on GitHub. For the frontend you’ll use Vue and popular tooling like vuex, vue-cli, vuetify, and vue-router. On the backend, you’ll use Go to write a REST API and persist your data in MongoDB.
Authentication and user management can be a major pain, so you’ll use JSON Web Token (JWT) based authentication when making requests from the SPA and Okta’s Go JWT Verifier as a middleware on your backend to validate the user’s token on every request.
Once complete, users will be able to authenticate via OpenID Connect (OIDC), search for projects on GitHub, favorite those projects and even add notes where needed!
Create the Vue and Go Directory Structure
For the sake of simplicity, let’s write the REST API and the SPA in the same project, starting with the project directory in the Go workspace.
Go projects live inside the directory the environment variable $GOPATH points to. In order to find the current $GOPATH value, run: go env GOPATH. To learn more about GOPATH, including how to set it yourself, refer to the official Go documentation on the topic.
If you’re totally new to Go, check out this article in order to understand how projects are organized inside the GOPATH directory.
With the GOPATH defined, you now can create a directory for your project:
mkdir -p $GOPATH/src/github.com/{YOUR_GITHUB_USERNAME}/kudo-oos
To get your SPA off the ground quickly, leverage the scaffolding functionality from vue-cli. The CLI will prompt you with a series of options – pick the technology appropriate for this project: vue.js, vuex, and, webpack.
Install vue-cli by running:
yarn global add @vue/cli
Then, create a new Vue project:
mkdir -p pkg/http/web
cd pkg/http/web
vue create app
You will be prompted with a series of questions about the project’s build details. For this app pick all the default choices.

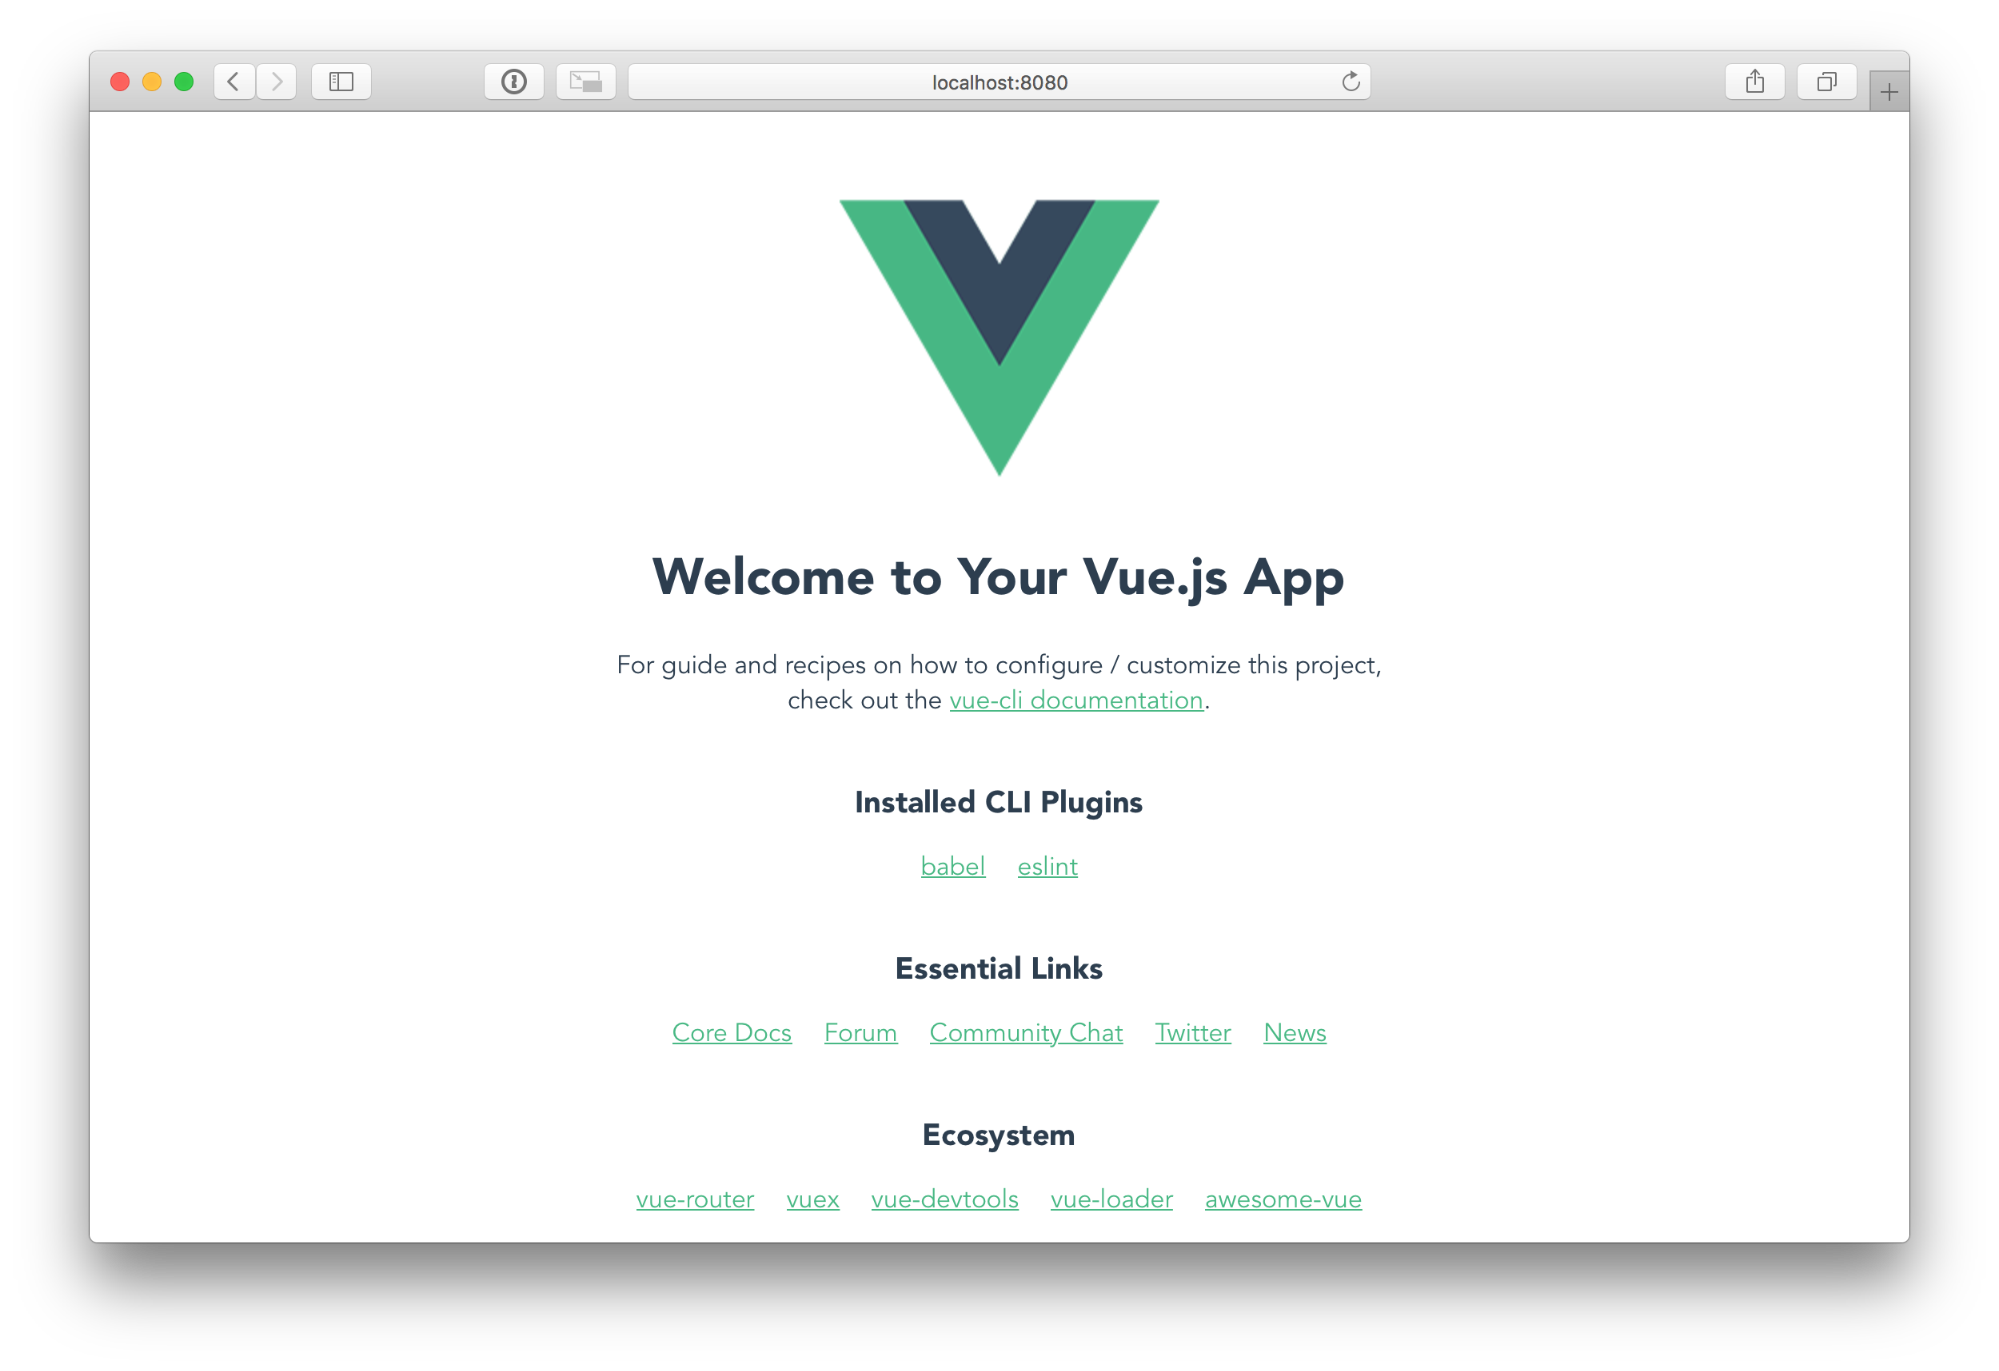
Congratulations, you have created your Vue.js SPA! Try it out by running:
cd app
yarn install
yarn serve
Open this URL: http://localhost:8080 in your browser and you should see the following.
Next, let’s make your SPA modern and responsive using vuetify.
Add Vuetify
Vuetify is a collection of Vue.js components that abstracts Material Design’s concepts. Vuetify provides out-of-the box features including a grid system, typography, basic layout, and also components like cards, dialogs, chips, tabs, icons and so on. Vuetify will pave your way to a rich UI!
When installing vuetify, you will be prompted with a series of questions. For the sake of simplicity just go with the default choices again.
vue add vuetify
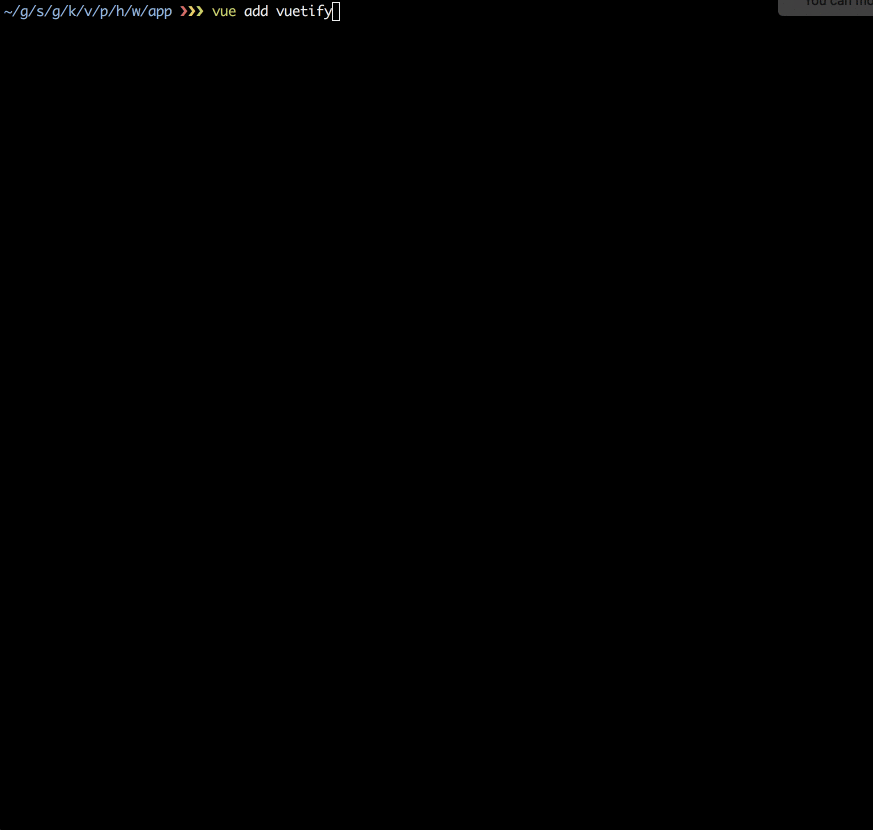
Spin up your SPA again to see vuetify in action.
yarn serve
Add Authentication to Your Vue App with Okta
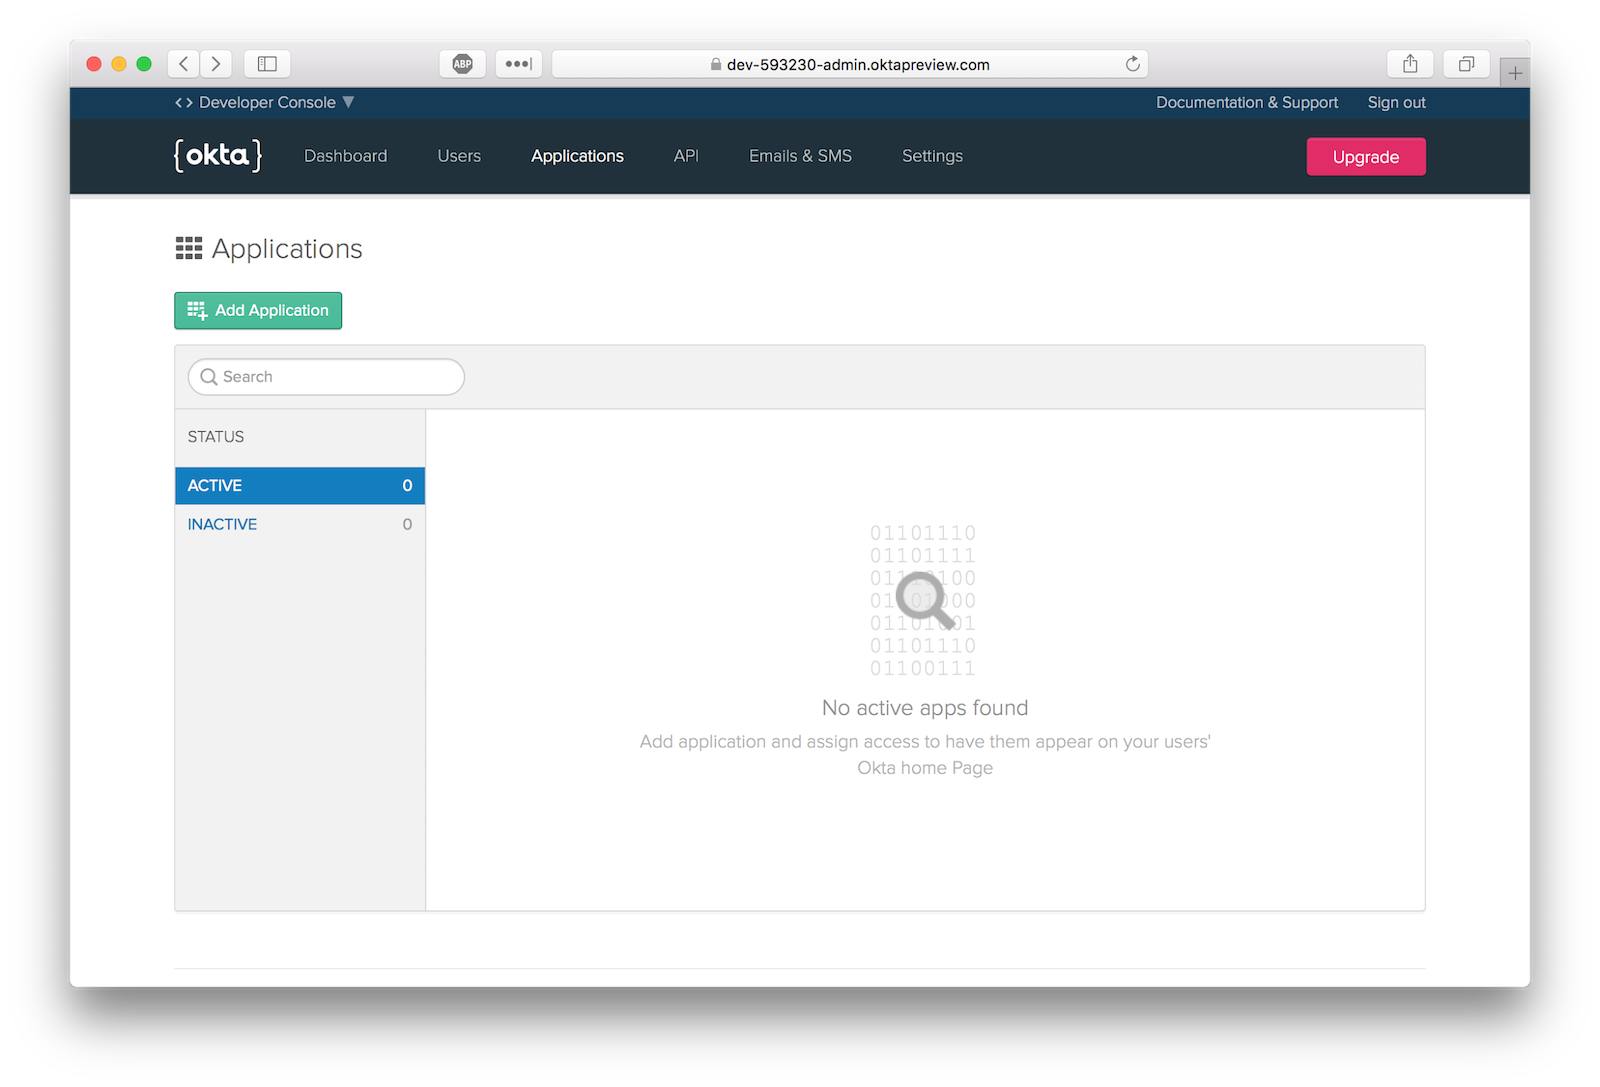
Writing secure user auth and building login pages are easy to get wrong and can be the downfall of a new project. Okta makes it simple to implement all the user management functionality quickly and securely. Get started by signing up for a free developer account and creating an OIDC application in Okta.
Once logged in, create a new application by clicking “Add Application”.
Select the “Single-Page App” platform option.
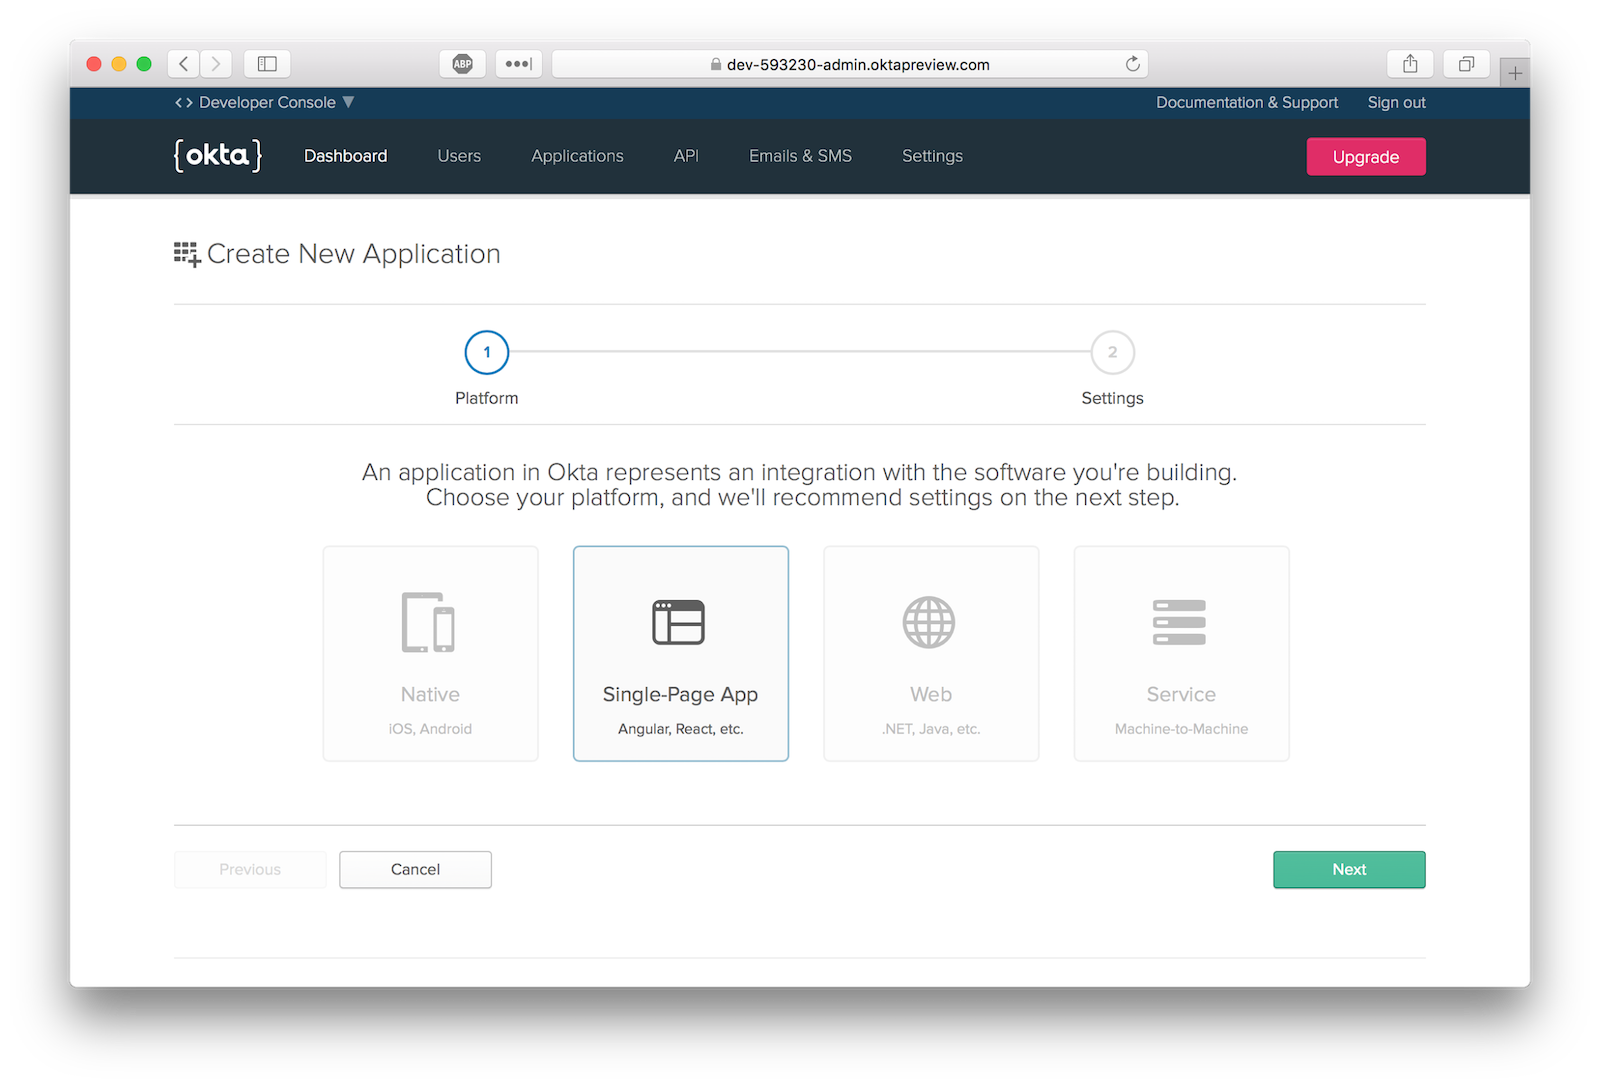
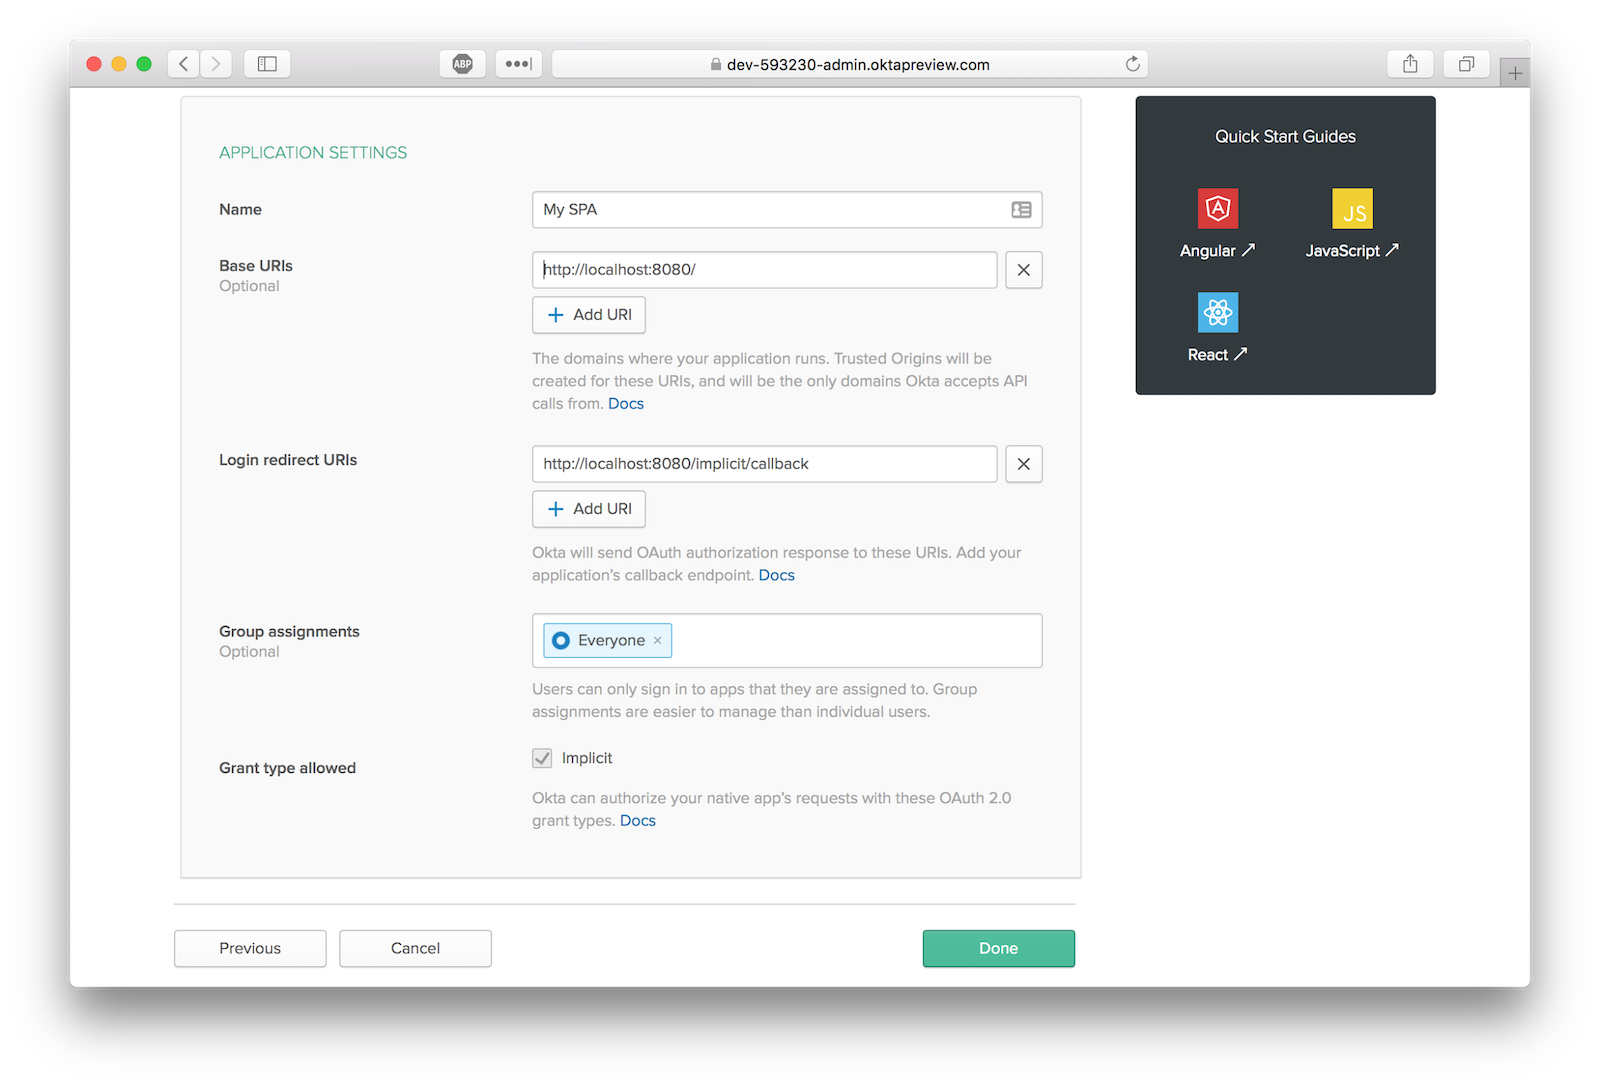
The default application settings should be the same as those pictured.
Next, install the Okta Vue SDK by running the following command:
yarn add @okta/okta-vue
Create Your Vue App Routes
For this app, you need only 4 routes, all of which require authentication except for the login route.
The root route / is our landing page where the login component will be rendered. Once the user has authenticated, we redirect them to the /me route where the bulk of the functionality takes place: The user should be able to query for OSS projects via GitHub’s REST API, favorite projects returned from the query, see more details about the project, and leave a note describing why the project is important to them.
Take note that both the /me and repo/:id have a meta: { requiresAuth: true } property specifying that the user must be authenticated to access that area of the app. The Okta plugin will use it to redirect the user the the Okta’s login page if not authenticated.
First, create pkg/http/web/app/src/routes.js and define the following routes:
import Vue from 'vue';
import VueRouter from 'vue-router';
import Auth from '@okta/okta-vue'

import Home from './components/Home';
import Login from './components/Login';
import GitHubRepoDetails from './components/GithubRepoDetails';

Vue.use(VueRouter);
Vue.use(Auth, {
  issuer: {ADD_YOUR_DOMAIN},
  client_id: {ADD_YOUR_CLIENT_ID},
  redirect_uri: 'http://localhost:8080/implicit/callback',
  scope: 'openid profile email'
})

export default new VueRouter({
 mode: 'history',
 routes: [
   { path: '/', component: Login },
   { path: '/me', component: Home, meta: { requiresAuth: true }},
   { name: 'repo-details', path: '/repo/:id', component: GitHubRepoDetails, meta: { requiresAuth: true } },
   { path: '/implicit/callback', component: Auth.handleCallback() }
 ]
});
Make sure to add your domain and client_id where indicated – these values can be found on the application overview page in the Okta Developer Console. Calling Vue.use(Auth, ...) will inject an authClient object into your Vue instance which can be accessed by calling this.$auth anywhere inside your Vue instance. This is what you’ll use to make sure a user is logged in and/or to force the user to identify themself!
Create Vue Components
The vue-router library contains a number of components to help developers create dynamic and rich UIs. One of them, router-view, renders the component for the matched route. In our case, when the user accesses the root route/,vue-routerwill render theLogincomponent as configured inrouters.js`.
Open ./kudo-oos/pkg/http/web/app/src/components/App.vue and copy in the following code.
<template>
 <v-app>
   <router-view></router-view>
   <Footer />
 </v-app>
</template>

<script>
import Footer from '@/components/Footer.vue'

export default {
 name: 'App',
 components: { Footer },
 data() {
   return {}
 }
}
</script>
For every route other than the matched route component, Vue will render the Footer component. Create ./kudo-oos/pkg/http/web/app/src/components/Footer.vue and copy in the following code to create that footer component.
<template>
<v-footer class="pa-3 white--text" color="teal" absolute>
<div>
Developed with ❤️ by {{YOUR_NAME}} © {{ new Date().getFullYear() }}
</div>
</v-footer>
</template>
Your landing page should now look like this:
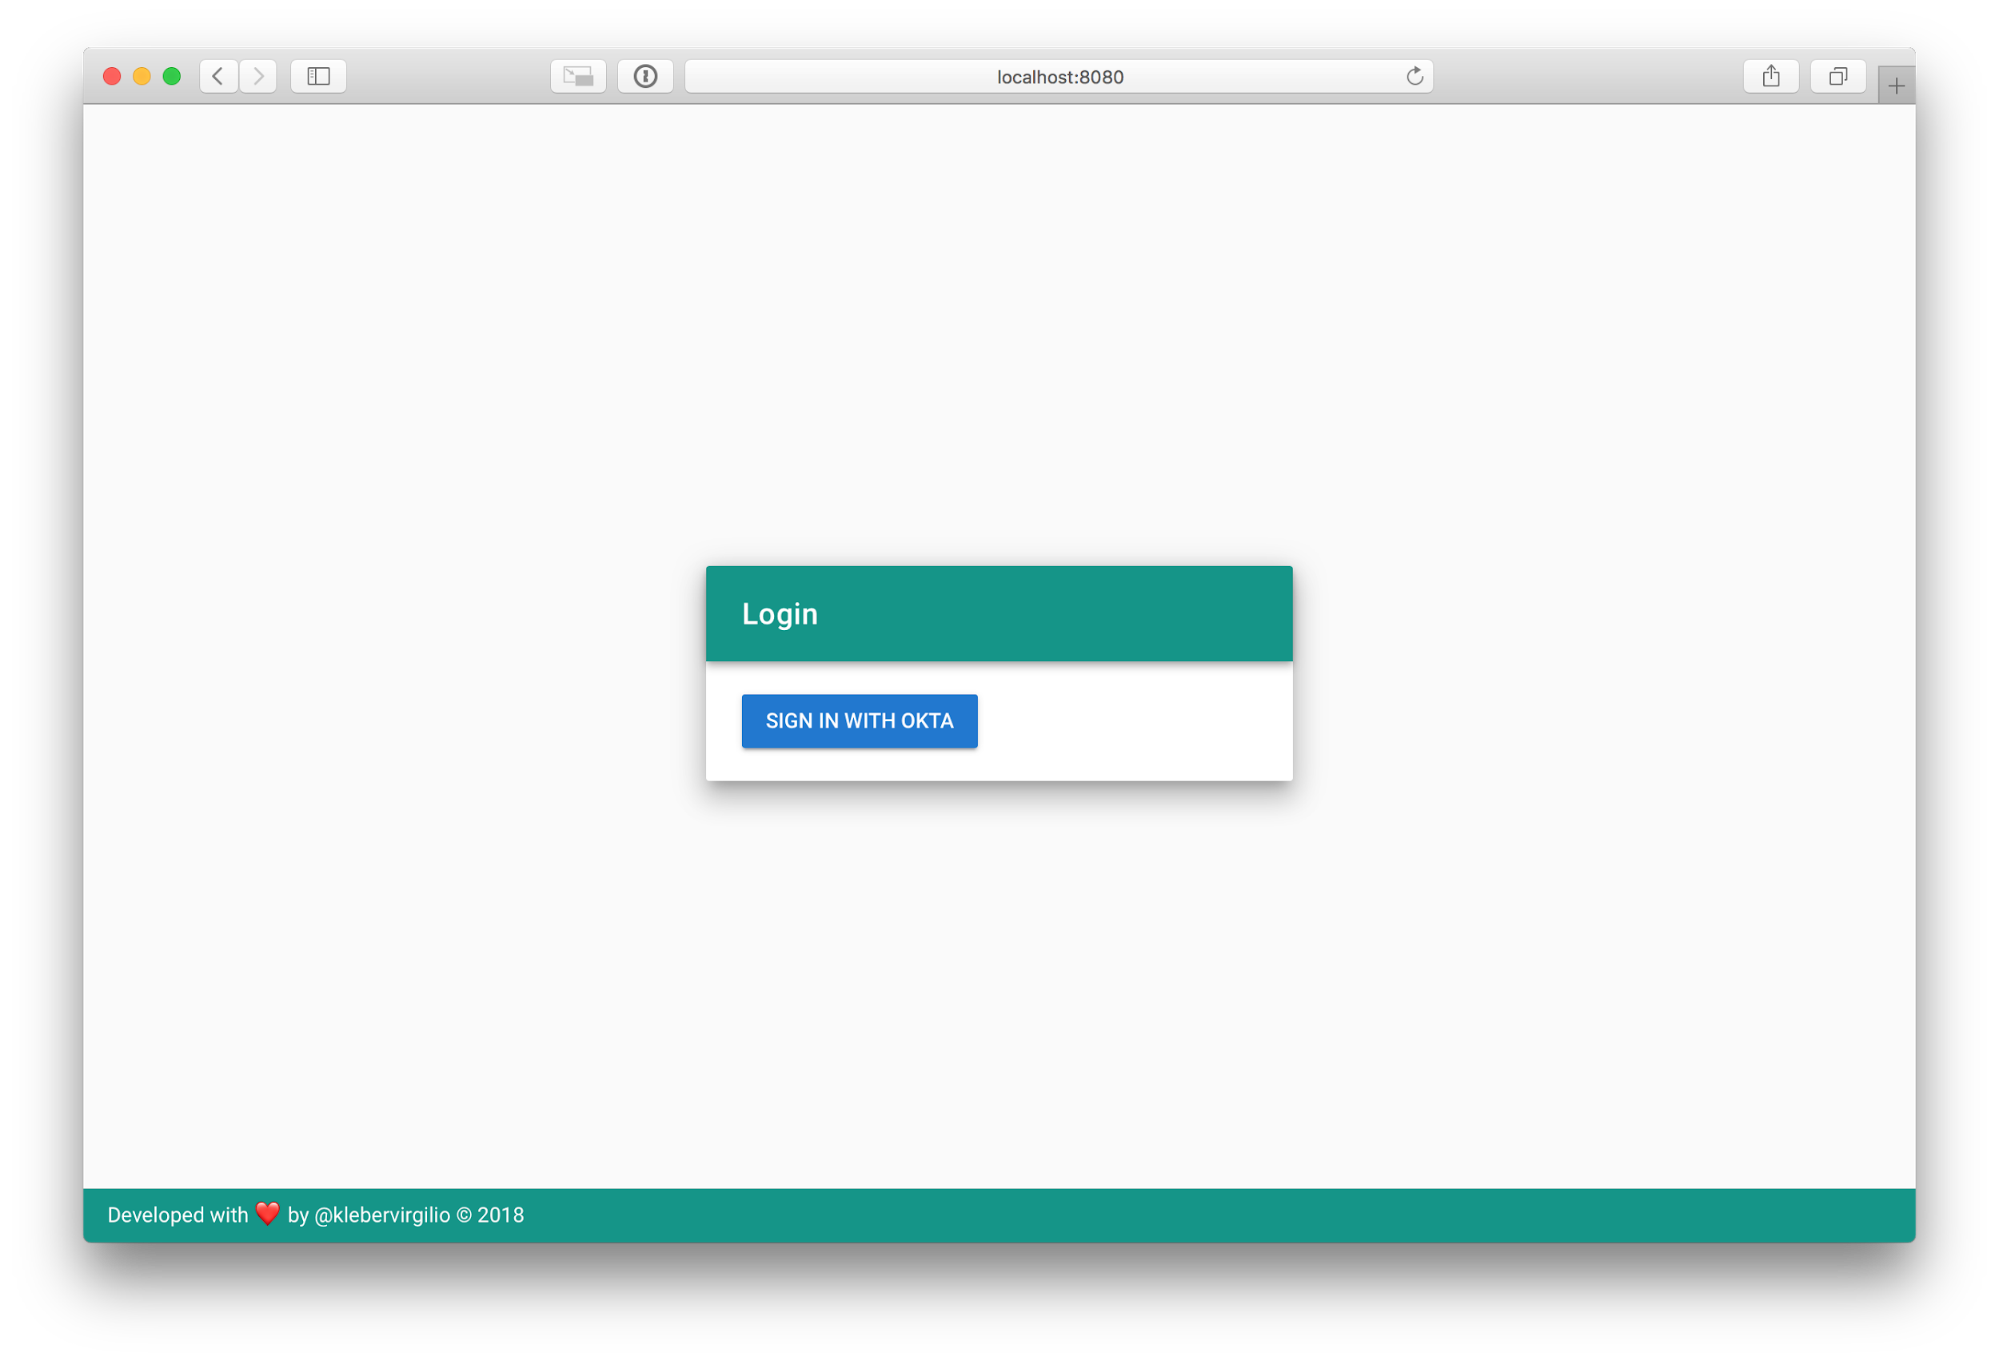
With our login component rendered, the user will be redirected to the login page after clicking the sign in button.
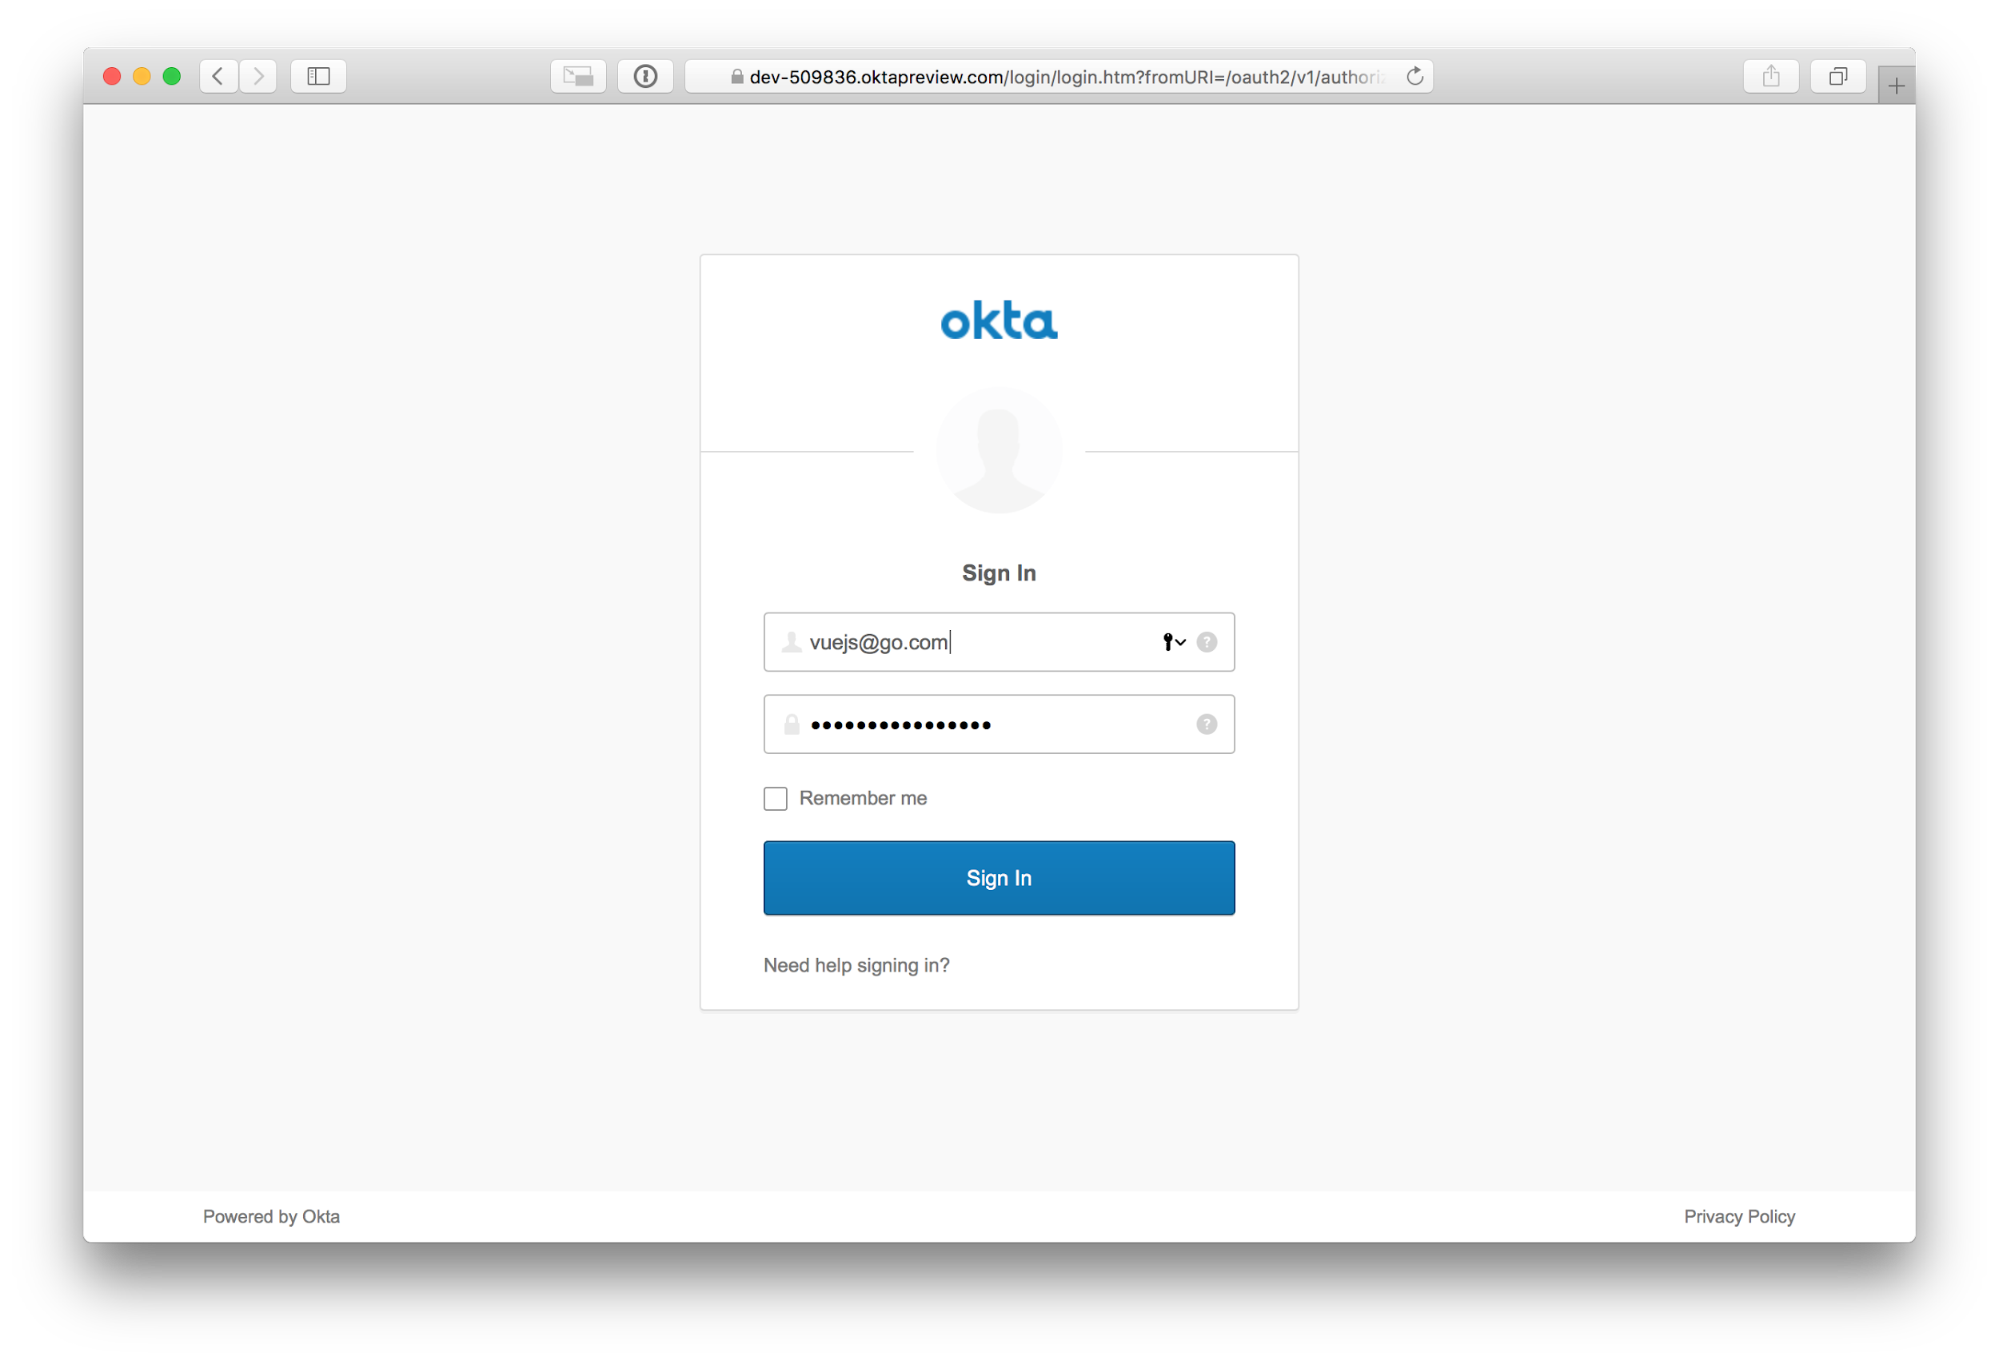
And after a successful login, the user is redirected back to your application to the configured route. In our app, that’s the /me route.
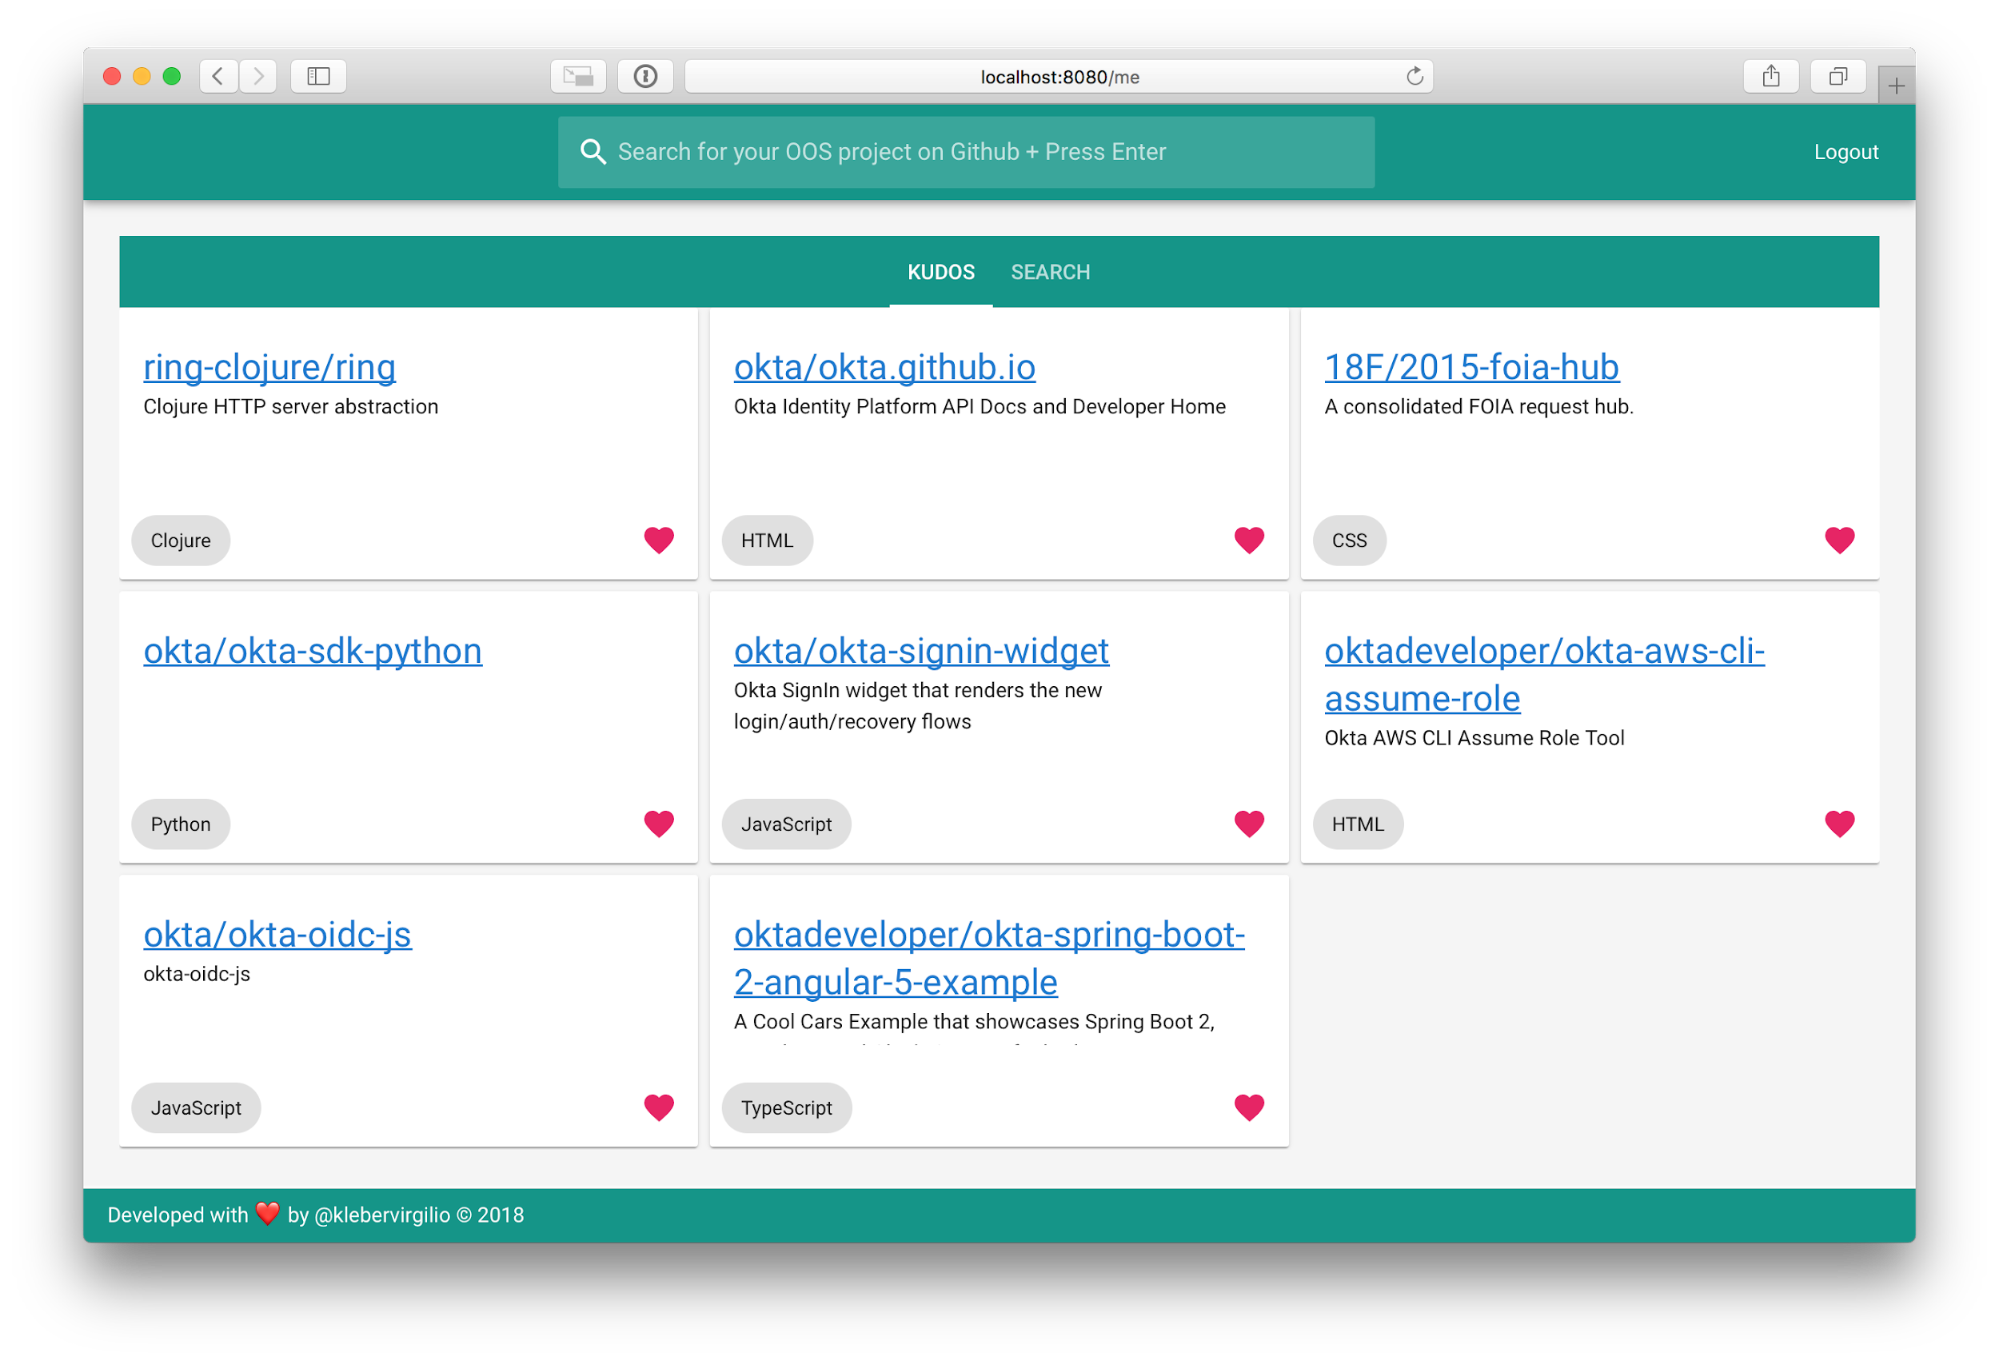
The /me route was configured to render the Home component, which in turn renders the Sidebar,the Kudos, and Search vuetify tabs. Each tab renders a specific set of GitHubRepos.
Go ahead and create the ./kudo-oos/pkg/http/web/app/src/components/Home.vue component.
<template>
 <div>
   <SearchBar v-on:search-submitted="githubQuery" />
   <v-container grid-list-md fluid class="grey lighten-4" >
        <v-tabs
       slot="extension"
       v-model="tabs"
       centered
       color="teal"
       text-color="white"
       slider-color="white"
     >
       <v-tab class="white--text" :key="2">
         KUDOS
       </v-tab>
       <v-tab class="white--text" :key="1">
         SEARCH
       </v-tab>
     </v-tabs>
       <v-tabs-items style="width:100%" v-model="tabs">
         <v-tab-item :key="2">
           <v-layout row wrap>
             <v-flex v-for="kudo in allKudos" :key="kudo.id" md4 >
               <GitHubRepo :repo="kudo" />
             </v-flex>
           </v-layout>
         </v-tab-item>
         <v-tab-item :key="1">
           <v-layout row wrap>
             <v-flex v-for="repo in repos" :key="repo.id" md4>
               <GitHubRepo :repo="repo" />
             </v-flex>
           </v-layout>
         </v-tab-item>
       </v-tabs-items>
   </v-container>
 </div>
</template>

<script>
import SearchBar from './SearchBar.vue'
import GitHubRepo from './GithubRepo.vue'
import githubClient from '../githubClient'
import { mapMutations, mapGetters, mapActions } from 'vuex'

export default {
 name: 'Home',
 components: { SearchBar, GitHubRepo },
 data() {
   return {
     tabs: 0
   }
 },
 computed: mapGetters(['allKudos', 'repos']),
 created() {
   this.getKudos();
 },
 methods: {
   githubQuery(query) {
     this.tabs = 1;
     githubClient
       .getJSONRepos(query)
       .then(response => this.resetRepos(response.items) )
   },
   ...mapMutations(['resetRepos']),
   ...mapActions(['getKudos']),
 },
}
</script>

<style>
.v-tabs__content {
  padding-bottom: 2px;
}
</style>
SearchBar is the first component rendered in Home. When the user enters a query into the text input in the Sidebar, the component triggers a call to the Github API. SearchBar simply emits an event to its parent, Home, which contains the githubQuery.
./kudo-oos/pkg/http/web/app/src/components/SearchBar.vue should look like this:
<template>
   <v-toolbar dark color="teal">
     <v-spacer></v-spacer>
     <v-text-field
       solo-inverted
       flat
       hide-details
       label="Search for your OOS project on Github + Press Enter"
       prepend-inner-icon="search"
       v-model="query"
       @keyup.enter="onSearchSubmition"
     ></v-text-field>
     <v-spacer></v-spacer>
     <button @click.prevent="logout">Logout</button>
   </v-toolbar>
</template>

<script>
export default {
   data() {
     return {
       query: null,
     };
   },
   props: ['defaultQuery'],
   methods: {
     onSearchSubmition() {
       this.$emit('search-submitted', this.query);
     },
     async logout () {
       await this.$auth.logout()
       this.$router.push('/')
   }
 }
}
</script>
Thanks to @keyup.enter="onSearchSubmition", whenever the user hits enter onSearchSubmition emits search-submitted with the query value. How do we capture this event you may ask? Simple! On the Home component, when you mounted the Sidebar component you also added a “listener” v-on:search-submitted="githubQuery" that calls githubQuery on every search-submitted event.
The Sidebar is also responsible for logging the user out. Okta Vue SDK offers a handy method to clean up the session using the method this.$auth.logout(). Whenever the user logs out, they can be redirected to the login page.
The second component rendered in Home is the GithupRepo. This component is used inside two tabs: the first tab Kudos represents the user’s favorites OSS projects and the Search tab renders the OSS projects returned from GitHub.
<template>
 <v-card >
   <v-card-title primary-title>
     <div class="repo-card-content">
       <h3 class="headline mb-0">
         <router-link :to="{ name: 'repo-details', params: { id: repo.id }}" >{{repo.full_name}}</router-link>
       </h3>
       <div>{{repo.description}}</div>
     </div>
   </v-card-title>
   <v-card-actions>
     <v-chip>
       {{repo.language}}
     </v-chip>
     <v-spacer></v-spacer>
     <v-btn @click.prevent="toggleKudo(repo)"  flat icon color="pink">
       <v-icon v-if="isKudo(repo)">favorite</v-icon>
       <v-icon v-else>favorite_border</v-icon>
     </v-btn>
   </v-card-actions>
 </v-card>
</template>

<script>
import { mapActions } from 'vuex';

export default {
 data() {
   return {}
 },
 props: ['repo'],
 methods: {
   isKudo(repo) {
     return this.$store.getters.isKudo(repo);
   },
   ...mapActions(['toggleKudo'])
 }
}
</script>

<style>
.repo-card-content {
  height: 90px;
  overflow: scroll;
}
</style>
Your SPA uses vuex to manage state in one centralized store accessible by all components. Vuex also ensures that access to the store is performed in a predictable fashion respecting a few rules. To read the state, you need to define getters, synchronous changes to the state must be done via mutations, and asynchronous changes are done via actions.
To install vuex, run:
yarn add vuex
You now need to create ./kudo-oos/pkg/http/web/app/src/store.js with actions, mutations and getters. Your initial data is { kudos: {}, repos: [] }. kudos holds all the user’s favorites OSS projects asa JavaScript Object where the key is the project id and the value is the project itself. repos is an array that holds the search results.
There are two cases in which you may need to mutate state. First, when the user logs in you need to fetch the user’s favorites OSS projects from the Go server and set the repos in the store by calling resetRepos. Second, when the user favorites or unfavorites an OSS project, you need update the kudos in the store by calling resetKudos to reflect that change on the server.
resetKudos is synchronous method that is called by actions inside asynchronous functions after each call to the Go server.
The Home component uses the getters allKudos and repos to render the list of Kudos and SearchResults. In order to know whether a repo has been favorited or not, your app needs to call the isKudo getter.
Create your ./kudo-oos/pkg/http/web/app/src/store.js with the code below:
import Vue from 'vue';
import Vuex from 'vuex';

import APIClient from './apiClient';

Vue.use(Vuex);

const store = new Vuex.Store({
 state: {
   kudos: {},
   repos: [],
 },
 mutations: {
   resetRepos (state, repos) {
     state.repos = repos;
   },
   resetKudos(state, kudos) {
     state.kudos = kudos;
   }
 },
 getters: {
   allKudos(state) {
     return Object.values(state.kudos);
   },
   kudos(state) {
     return state.kudos;
   },
   repos(state) {
     return state.repos;
   },
   isKudo(state) {
     return (repo)=> {
       return !!state.kudos[repo.id];
     };
   }
 },
 actions: {
   getKudos ({commit}) {
     APIClient.getKudos().then((data) => {
       commit('resetKudos', data.reduce((acc, kudo) => {
                              return {[kudo.id]: kudo, ...acc}
                            }, {}))
     })
   },
   updateKudo({ commit, state }, repo) {
     const kudos = { ...state.kudos, [repo.id]: repo };

     return APIClient
       .updateKudo(repo)
       .then(() => {
         commit('resetKudos', kudos)
       });
   },
   toggleKudo({ commit, state }, repo) {
     if (!state.kudos[repo.id]) {
       return APIClient
         .createKudo(repo)
         .then(kudo => commit('resetKudos', { [kudo.id]: kudo, ...state.kudos }))
     }

     const kudos = Object.entries(state.kudos).reduce((acc, [repoId, kudo]) => {
                     return (repoId == repo.id) ? acc
                                                : { [repoId]: kudo, ...acc };
                   }, {});

     return APIClient
       .deleteKudo(repo)
       .then(() => commit('resetKudos', kudos));
   }
 }
});

export default store;
Inside actions you are performing ajax calls to the Go server. Every request made to the server must be authenticated or the server will respond with a client error. When the user logs in, an access token is created and can be accessed by calling: await Vue.prototype.$auth.getAccessToken(). This asynchronous function returns an access token required to send authenticated requests to the server.
The Go server exposes a REST API for the kudo resource. You will implement methods to make ajax calls in order to create with createKudo, update with updateKudo, delete with deleteKudo, and list all kudos withgetKudos. Notice that these methods call the perform method by passing the endpoint and the HTTP verb. perform, in turn, populates the request Authorization header with the access token so the Go server can validate the request.
Create your ./kudo-oos/pkg/http/web/app/src/apiClient.js with the code below.
import Vue from 'vue';
import axios from 'axios';

const BASE_URI = 'http://localhost:4444';

const client = axios.create({
  baseURL: BASE_URI,
  json: true
});

const APIClient =  {
  createKudo(repo) {
    return this.perform('post', '/kudos', repo);
  },

  deleteKudo(repo) {
    return this.perform('delete', `/kudos/${repo.id}`);
  },

  updateKudo(repo) {
    return this.perform('put', `/kudos/${repo.id}`, repo);
  },

  getKudos() {
    return this.perform('get', '/kudos');
  },

  getKudo(repo) {
    return this.perform('get', `/kudo/${repo.id}`);
  },

  async perform (method, resource, data) {
    let accessToken = await Vue.prototype.$auth.getAccessToken()
    return client({
      method,
      url: resource,
      data,
      headers: {
        Authorization: `Bearer ${accessToken}`
      }
    }).then(req => {
      return req.data
    })
  }
}

export default APIClient;
Each GithubRepo has a router-link to /repo/:id that renders the GithubRepoDetails component. GithubRepoDetails shows details about the OSS project, like how many times the project has been of starred and the amount of open issues. The user can also leave a note describing why the project is special by clicking the Kudo button. The message is sent to Go server button by calling updateKudo.
Create your ./kudo-oos/pkg/http/web/app/src/components/GithubRepoDetails.js with the code below.
<template>
  <v-container grid-list-md fluid class="grey lighten-4" >
    <v-layout align-center justify-space-around wrap>
      <v-flex md6>
        <h1 class="primary--text">
          <a :href="repo.html_url">{{repo.full_name}}</a>
        </h1>

        <v-chip class="text-xs-center">
          <v-avatar class="teal">
            <v-icon class="white--text">star</v-icon>
          </v-avatar>
          Stars: {{repo.stargazers_count}}
        </v-chip>

        <v-chip class="text-xs-center">
          <v-avatar class="teal white--text">L</v-avatar>
          Language: {{repo.language}}
        </v-chip>

        <v-chip class="text-xs-center">
          <v-avatar class="teal white--text">O</v-avatar>
          Open Issues: {{repo.open_issues_count}}
        </v-chip>

        <v-textarea
          name="input-7-1"
          label="Show some love"
          value=""
          v-model="repo.notes"
          hint="Describe why you love this project"
        ></v-textarea>
        <v-btn @click.prevent="updateKudo(repo)"> Kudo </v-btn>
        <router-link tag="a" to="/me">Back</router-link>
      </v-flex>
    </v-layout>
  </v-container>
</template>

<script>
import { mapActions, mapGetters } from 'vuex';
import githubClient from '../githubClient';

export default {
  data() {
    return {
      repo: {}
    }
  },
  watch: {
    '$route': 'fetchData'
  },
  computed: mapGetters(['kudos']),
  created() {
    this.fetchData();
  },
  methods: {
    fetchData() {
      githubClient
        .getJSONRepo(this.$route.params.id)
        .then((response) => {
          this.repo = Object.assign(response, this.kudos[this.$route.params.id])
        })
    },
    ...mapActions(['updateKudo'])
  }
}
</script>
Now that your router, store, and components are in place, go ahead and modify ./kudo-oos/pkg/http/web/app/src/main.js to properly initialize your SPA.
import '@babel/polyfill'
import Vue from 'vue'
import './plugins/vuetify'
import App from './App.vue'
import store from './store'
import router from './routes'

Vue.config.productionTip = process.env.NODE_ENV == 'production';

router.beforeEach(Vue.prototype.$auth.authRedirectGuard())

new Vue({
 store,
 router,
 render: h => h(App)
}).$mount('#app')
Note that we are calling router.beforeEach(Vue.prototype.$auth.authRedirectGuard()) to look for routes tagged with meta: {requiresAuth: true} and redirect the user to the authentication flow if they are not logged in.
Create a REST API with Go
Now that users can securely authenticate on the frontend, you need to create a HTTP server written in Go to handle the requests, validate whether the user is authenticated, and perform CRUD operations.
I like using the dep tool to manage dependencies, so be sure to install it from here before continuing.
dep init
dep ensure -add github.com/okta/okta-jwt-verifier-golang
dep ensure -add github.com/rs/cors
dep ensure -add github.com/globalsign/mgo
You now need a structure to represent a GitHub repository. Start by creating ./kudo-oos/pkg/core/kudo.go and define the following struct to represent a “kudo” (someone giving kudos to a specific repo).
package core

// Kudo represents a oos kudo.
type Kudo struct {
  UserID      string `json:"user_id" bson:"userId"`
  RepoID      string `json:"id" bson:"repoId"`
  RepoName    string `json:"full_name" bson:"repoName"`
  RepoURL     string `json:"html_url" bson:"repoUrl"`
  Language    string `json:"language" bson:"language"`
  Description string `json:"description" bson:"description"`
  Notes       string `json:"notes" bson:"notes"`
}
Next, create ./kudo-oos/pkg/core/repository.go file and add the following interface to represent an API for any persistence layer you might want to use. In this article, we are going to use MongoDB.
package core
// Repository defines the API a repository implementation should follow.
type Repository interface {
  Find(id string) (*Kudo, error)
  FindAll(selector map[string]interface{}) ([]*Kudo, error)
  Delete(kudo *Kudo) error
  Update(kudo *Kudo) error
  Create(kudo ...*Kudo) error
  Count() (int, error)
}
Finally, create the MongoDB repository that implements the interface you’ve just created. Create ./kudo-oos/pkg/storage/mongo.go and add the following code.
package storage

import (
  "log"
  "os"

  "github.com/globalsign/mgo"
  "github.com/globalsign/mgo/bson"
  "github.com/{YOUR_GITHUB_USERNAME}/kudo-oos/pkg/core"
)

const (
  collectionName = "kudos"
)

func GetCollectionName() string {
  return collectionName
}

type MongoRepository struct {
  logger  *log.Logger
  session *mgo.Session
}

// Find fetches a kudo from mongo according to the query criteria provided.
func (r MongoRepository) Find(repoID string) (*core.Kudo, error) {
  session := r.session.Copy()
  defer session.Close()
  coll := session.DB("").C(collectionName)

  var kudo core.Kudo
  err := coll.Find(bson.M{"repoId": repoID, "userId": kudo.UserID}).One(&kudo)
  if err != nil {
    r.logger.Printf("error: %v\n", err)
    return nil, err
  }
  return &kudo, nil
}

// FindAll fetches kudos from the database.
func (r MongoRepository) FindAll(selector map[string]interface{}) ([]*core.Kudo, error) {
  session := r.session.Copy()
  defer session.Close()
  coll := session.DB("").C(collectionName)

  var kudos []*core.Kudo
  err := coll.Find(selector).All(&kudos)
  if err != nil {
    r.logger.Printf("error: %v\n", err)
    return nil, err
  }
  return kudos, nil
}

// Delete deletes a kudo from mongo according to the query criteria provided.
func (r MongoRepository) Delete(kudo *core.Kudo) error {
  session := r.session.Copy()
  defer session.Close()
  coll := session.DB("").C(collectionName)

  return coll.Remove(bson.M{"repoId": kudo.RepoID, "userId": kudo.UserID})
}

// Update updates an kudo.
func (r MongoRepository) Update(kudo *core.Kudo) error {
  session := r.session.Copy()
  defer session.Close()
  coll := session.DB("").C(collectionName)

  return coll.Update(bson.M{"repoId": kudo.RepoID, "userId": kudo.UserID}, kudo)
}

// Create kudos in the database.
func (r MongoRepository) Create(kudos ...*core.Kudo) error {
  session := r.session.Copy()
  defer session.Close()
  coll := session.DB("").C(collectionName)

  for _, kudo := range kudos {
    _, err := coll.Upsert(bson.M{"repoId": kudo.RepoID, "userId": kudo.UserID}, kudo)
    if err != nil {
      return err
    }
  }

  return nil
}

// Count counts documents for a given collection
func (r MongoRepository) Count() (int, error) {
  session := r.session.Copy()
  defer session.Close()
  coll := session.DB("").C(collectionName)
  return coll.Count()
}

// NewMongoSession dials mongodb and creates a session.
func newMongoSession() (*mgo.Session, error) {
  mongoURL := os.Getenv("MONGO_URL")
  if mongoURL == "" {
    log.Fatal("MONGO_URL not provided")
  }
  return mgo.Dial(mongoURL)
}

func newMongoRepositoryLogger() *log.Logger {
  return log.New(os.Stdout, "[mongoDB] ", 0)
}

func NewMongoRepository() core.Repository {
  logger := newMongoRepositoryLogger()
  session, err := newMongoSession()
  if err != nil {
    logger.Fatalf("Could not connect to the database: %v\n", err)
  }

  return MongoRepository{
    session: session,
    logger:  logger,
  }
}
Add the Go Backend
Before you can create HTTP handlers, you’ll need to write code to handle incoming request payloads.
Create ./kudo-oos/pkg/kudo/service.go and insert the code below.
package kudo

import (
  "strconv"

  "github.com/{YOUR_GITHUB_USERNAME}/kudo-oos/pkg/core"
)

type GitHubRepo struct {
  RepoID      int64  `json:"id"`
  RepoURL     string `json:"html_url"`
  RepoName    string `json:"full_name"`
  Language    string `json:"language"`
  Description string `json:"description"`
  Notes       string `json:"notes"`
}

type Service struct {
  userId string
  repo   core.Repository
}

func (s Service) GetKudos() ([]*core.Kudo, error) {
  return s.repo.FindAll(map[string]interface{}{"userId": s.userId})
}

func (s Service) CreateKudoFor(githubRepo GitHubRepo) (*core.Kudo, error) {
  kudo := s.githubRepoToKudo(githubRepo)
  err := s.repo.Create(kudo)
  if err != nil {
    return nil, err
  }
  return kudo, nil
}

func (s Service) UpdateKudoWith(githubRepo GitHubRepo) (*core.Kudo, error) {
  kudo := s.githubRepoToKudo(githubRepo)
  err := s.repo.Create(kudo)
  if err != nil {
    return nil, err
  }
  return kudo, nil
}

func (s Service) RemoveKudo(githubRepo GitHubRepo) (*core.Kudo, error) {
  kudo := s.githubRepoToKudo(githubRepo)
  err := s.repo.Delete(kudo)
  if err != nil {
    return nil, err
  }
  return kudo, nil
}

func (s Service) githubRepoToKudo(githubRepo GitHubRepo) *core.Kudo {
  return &core.Kudo{
    UserID:      s.userId,
    RepoID:      strconv.Itoa(int(githubRepo.RepoID)),
    RepoName:    githubRepo.RepoName,
    RepoURL:     githubRepo.RepoURL,
    Language:    githubRepo.Language,
    Description: githubRepo.Description,
    Notes:       githubRepo.Notes,
  }
}

func NewService(repo core.Repository, userId string) Service {
  return Service{
    repo:   repo,
    userId: userId,
  }
}
Define Go HTTP Handlers
Your REST API exposes the kudo resource to support clients like your SPA. A normal SPA will expose endpoints so clients can create, update, delete, and list resources. For instance, when the user logs in, a request is made to fetch all the kudos for the authenticated user via GET /kudos.
 # Fetches all open source projects favorited by the user
GET /kudos
# Fetches a favorited open source project by id
GET /kudos/:id
# Creates (or favorites)  a open source project for the logged in user
POST /kudos
# Updates  a favorited open source project
PUT /kudos/:id
# Deletes (or unfavorites) a favorited open source project
DELETE /kudos/:id
To support this, you need to add new file named ./kudo-oos/pkg/http/handlers.go and define your HTTP handlers using the fabulous httprouter library.
package http

import (
  "encoding/json"
  "io/ioutil"
  "net/http"
  "strconv"

  "github.com/julienschmidt/httprouter"
  "github.com/{YOUR_GITHUB_USERNAME}/kudo-oos/pkg/core"
  "github.com/{YOUR_GITHUB_USERNAME}/kudo-oos/pkg/kudo"
)

type Service struct {
  repo   core.Repository
  Router http.Handler
}

func New(repo core.Repository) Service {
  service := Service{
    repo: repo,
  }

  router := httprouter.New()
  router.GET("/kudos", service.Index)
  router.POST("/kudos", service.Create)
  router.DELETE("/kudos/:id", service.Delete)
  router.PUT("/kudos/:id", service.Update)

  service.Router = UseMiddlewares(router)

  return service
}

func (s Service) Index(w http.ResponseWriter, r *http.Request, params httprouter.Params) {
  service := kudo.NewService(s.repo, r.Context().Value("userId").(string))
  kudos, err := service.GetKudos()

  if err != nil {
    w.WriteHeader(http.StatusInternalServerError)
    return
  }
  w.WriteHeader(http.StatusOK)
  json.NewEncoder(w).Encode(kudos)
}

func (s Service) Create(w http.ResponseWriter, r *http.Request, params httprouter.Params) {
  service := kudo.NewService(s.repo, r.Context().Value("userId").(string))
  payload, _ := ioutil.ReadAll(r.Body)

  githubRepo := kudo.GitHubRepo{}
  json.Unmarshal(payload, &githubRepo)

  kudo, err := service.CreateKudoFor(githubRepo)

  if err != nil {
    w.WriteHeader(http.StatusInternalServerError)
    return
  }
  w.WriteHeader(http.StatusCreated)
  json.NewEncoder(w).Encode(kudo)
}

func (s Service) Delete(w http.ResponseWriter, r *http.Request, params httprouter.Params) {
  service := kudo.NewService(s.repo, r.Context().Value("userId").(string))

  repoID, _ := strconv.Atoi(params.ByName("id"))
  githubRepo := kudo.GitHubRepo{RepoID: int64(repoID)}

  _, err := service.RemoveKudo(githubRepo)
  if err != nil {
    w.WriteHeader(http.StatusInternalServerError)
    return
  }
  w.WriteHeader(http.StatusOK)
}

func (s Service) Update(w http.ResponseWriter, r *http.Request, params httprouter.Params) {
  service := kudo.NewService(s.repo, r.Context().Value("userId").(string))
  payload, _ := ioutil.ReadAll(r.Body)

  githubRepo := kudo.GitHubRepo{}
  json.Unmarshal(payload, &githubRepo)

  kudo, err := service.UpdateKudoWith(githubRepo)
  if err != nil {
    w.WriteHeader(http.StatusInternalServerError)
    return
  }
  w.WriteHeader(http.StatusOK)
  json.NewEncoder(w).Encode(kudo)
}
Verify JSON Web Tokens (JWTs) with Go
This is the most crucial component of your REST API server. Without this middleware, any user can perform CRUD operations against the database.
In the event that no valid JWT is provided in the HTTP authorization header, the API call is aborted and an error returned to the client.
Create ./kudo-oos/pkg/http/middlewares.go and paste in the following code:
package http

import (
  "context"
  "log"
  "net/http"
  "strings"

  jwtverifier "github.com/okta/okta-jwt-verifier-golang"
  "github.com/rs/cors"
)

func OktaAuth(h http.Handler) http.Handler {
  return http.HandlerFunc(func(w http.ResponseWriter, r *http.Request) {
    accessToken := r.Header["Authorization"]
    jwt, err := validateAccessToken(accessToken)
    if err != nil {
      w.WriteHeader(http.StatusForbidden)
      w.Write([]byte(err.Error()))
      return
    }
    ctx := context.WithValue(r.Context(), "userId", jwt.Claims["sub"].(string))
    h.ServeHTTP(w, r.WithContext(ctx))
  })
}

func validateAccessToken(accessToken []string) (*jwtverifier.Jwt, error) {
  parts := strings.Split(accessToken[0], " ")
  jwtVerifierSetup := jwtverifier.JwtVerifier{
    Issuer:           "{DOMAIN}",
    ClaimsToValidate: map[string]string{"aud": "api://default", "cid": "{CLIENT_ID}"},
  }
  verifier := jwtVerifierSetup.New()
  return verifier.VerifyIdToken(parts[1])
}

func JSONApi(h http.Handler) http.Handler {
  return http.HandlerFunc(func(w http.ResponseWriter, r *http.Request) {
    w.Header().Set("Content-Type", "application/json")
    h.ServeHTTP(w, r)
  })
}

func AccsessLog(h http.Handler) http.Handler {
  return http.HandlerFunc(func(w http.ResponseWriter, r *http.Request) {
    log.Printf("%s: %s", r.Method, r.RequestURI)
    h.ServeHTTP(w, r)
  })
}

func Cors(h http.Handler) http.Handler {
  corsConfig := cors.New(cors.Options{
    AllowedHeaders: []string{"Origin", "Accept", "Content-Type", "X-Requested-With", "Authorization"},
    AllowedMethods: []string{"POST", "PUT", "GET", "PATCH", "OPTIONS", "HEAD", "DELETE"},
    Debug:          true,
  })
  return corsConfig.Handler(h)
}

func UseMiddlewares(h http.Handler) http.Handler {
  h = JSONApi(h)
  h = OktaAuth(h)
  h = Cors(h)
  return AccsessLog(h)
}
As you can see, the middleware OktaAuth uses okta-jwt-verifier-golang to validate the user’s access token.
Define Your Go REST API Entry Point
Open up ./kudo-oos/pkg/cmd/main.go and add the following code to spin up your Go webserver.
package main

import (
  "log"
  "net/http"
  "os"

  web "github.com/{YOUR_GITHUB_USERNAME}/kudo-oos/pkg/http"
  "github.com/{YOUR_GITHUB_USERNAME}/kudo-oos/pkg/storage"
)

func main() {
  httpPort := os.Getenv("PORT")

  repo := storage.NewMongoRepository()
  webService := web.New(repo)

  log.Printf("Running on port %s\n", httpPort)
  log.Fatal(http.ListenAndServe(httpPort, webService.Router))
}
Run the Go +Vue SPA
There are many ways to run backend and frontend apps. The simplest way (for development purposes) is to just use good old fashioned Make.
A Makefile contains build instructions for your website. It’s like an old-school version of gulp, grunt, and the more hip Node tools. To get started, create a file named Makefile in the root of your project folder and copy in the following code.
setup: run_services
    @go run ./cmd/db/setup.go

run_services:
    @docker-compose up --build -d

run_server:
    @MONGO_URL=mongodb://mongo_user:mongo_secret@0.0.0.0:27017/kudos PORT=:4444 go run cmd/main.go

run_client:
    @/bin/bash -c "cd $$GOPATH/src/github.com/klebervirgilio/kudo-oos/pkg/http/web/app && yarn serve"
Create a Dockerfile
Next, you’ll want to create a Dockerfile. This file tells Docker how to run your application and spares you the effort of deploying a real MongoDB instance for testing purposes.
All you need to do here is create a file named docker-compose.yml and copy in the following code.
version: '3'
services:
  mongo:
    image: mongo
    restart: always
    ports:
     - "27017:27017"
    environment:
      MONGO_INITDB_ROOT_USERNAME: mongo_user
      MONGO_INITDB_ROOT_PASSWORD: mongo_secret
Your app is now ready to test! Run the following commands to get going.
make setup
make run_server
make run_client
Your Go webserver should be listening on 0.0.0.0:4444 and your SPA should be serving files from http://localhost:8080. Visit http://localhost:8080 to play around with your new app!
Learn More About Go and Vue
Vue.js is a powerful and straightforward framework with phenomenal adoption and community growth. In this tutorial, you learned to build a fully-functional, secure SPA with Vue and Go.
To learn more about Vue.js, head over to https://vuejs.org or check out these other great resources from the @oktadev team:
- The Ultimate Guide to Progressive Web Applications
- The Lazy Developer’s Guide to Authentication with Vue.js
- Build a Cryptocurrency Comparison Site with Vue.js
If you have any questions, please let us know in the comments or follow and tweet us @oktadev.
 Kleber Correia