

Hi everyone! In this article we're going to take a look at some of the many ways you can build a React application these days. We'll compare their main characteristics, along with their pros and cons.
We'll start by explaining what React is and what improvements it brought over the previous era of web development. Then we're going to build a React app from scratch to get a good idea of the libraries that conform React, and how it interacts with dependencies such as bundlers (like Webpack) and compilers (like Babel).
Finally, we're going to review more realistic approaches like CRA (create-react-app) and modern alternatives like Vite, Astro, Gatsby, Next and Remix.
This should be a longish but interesting article to read if you're wondering how React works under the hood, or if you want to know more about the differences between the many building tools available.
Let's hop on to it!
Table of Contents
- What is React and what does it do?
- How to build a React app
- Client side rendering (CSR) vs Server side rendering (SSR)
- SSR building tools
- React's metaframeworks
- Wrapping up
What is React and What Does it Do?
React.js is a popular open-source JavaScript library for building user interfaces (UIs) that was developed by Facebook. It enables developers to create reusable UI components and declaratively specify how the UI should look and behave based on changes in the application state.
If you wonder what "declaratively" means, you might be interested in this article about programming paradigms I wrote a while ago.
React follows a component-based architecture, where each UI element is represented as a separate component that can be reused throughout the application. React allows developers to create these components using a combination of HTML-like syntax called JSX and JavaScript code.
React uses a virtual DOM (Document Object Model) to efficiently update the actual DOM when the application state changes. This means that instead of updating the entire page every time a change occurs, React updates only the specific components that need to be changed. This makes React applications faster and more responsive compared to traditional JavaScript frameworks.
You can use React to build single-page applications, mobile applications, and even desktop applications using tools such as Electron. You can also combine it with other libraries and frameworks to build more complex applications.
React has a large and active community, with a wealth of resources and third-party libraries available to help developers get started quickly.
This all sounds pretty good, but it's tough to understand the value of a tool like React if you don't know how web development used to be before it. So let's take a quick look at that now.
Web Development Before React
Before React.js, web development was heavily reliant on traditional client-side scripting using vanilla JavaScript and libraries like jQuery.
Web developers used to build web applications by directly manipulating the Document Object Model (DOM) of web pages using JavaScript. This approach was often time-consuming and error-prone, especially for complex applications.
jQuery, a popular JavaScript library, was introduced as a way to simplify the process of manipulating the DOM and handling browser events. It provided a concise and easy-to-use syntax for selecting and manipulating HTML elements on a page.
jQuery was widely adopted by web developers due to its simplicity, and it helped to improve the efficiency of client-side scripting.
Other JavaScript frameworks such as AngularJS and Backbone.js also gained popularity in the early 2010s.
AngularJS provided a more structured approach to building web applications and was heavily focused on data binding and dependency injection. Backbone.js was a lightweight framework that allowed developers to create simple web applications with minimal overhead.
But despite their popularity, these JavaScript frameworks had various limitations. For example, they did not provide an efficient way of managing the state of web applications, which could lead to performance issues and slow page load times. They also did not provide an easy way to create reusable components, which could make it challenging to build complex web applications.
React.js addressed many of these limitations by introducing a new way of thinking about building web applications.
React.js allowed developers to create reusable UI components that could be composed together to build complex interfaces. It also introduced the concept of a virtual DOM, which improved the performance of web applications by minimizing the number of updates required to the actual DOM.
Overall, while vanilla JavaScript and libraries like jQuery were essential in the early days of web development, they were limited in their ability to handle complex applications. The emergence of frameworks like React.js has made it easier for developers to build scalable and efficient web applications.
The Benefits of React
React.js brought several improvements over traditional client-side scripting using vanilla JavaScript and libraries like jQuery, as well as over other JavaScript frameworks like Backbone.js, AngularJS, and Knockout.js. Some of these improvements include:
- Component-Based Architecture: React.js introduced the concept of a component-based architecture, where UI elements are represented as separate reusable components that can be composed together to create complex interfaces. This approach makes it easier to manage complex web applications, improves code reusability, and allows for more efficient testing and debugging.
- Virtual DOM: React.js introduced the concept of a virtual DOM, which is a lightweight representation of the actual DOM. The virtual DOM makes it possible to update the user interface without re-rendering the entire page. This results in faster page load times and improved performance, especially for complex applications.
- JSX: React.js introduced JSX, a syntax extension that allows developers to write HTML-like code in JavaScript files. This makes it easier to write and maintain code, especially for developers who are more familiar with HTML than with JavaScript.
- A different way to separate concerns: In previous paradigms, we used to have HTML, CSS and JavaScript divided into different files. Under React's paradigm, using JSX we can have HTML, JS, and (optionally) CSS in the same file, and divide our files according to the UI components they're responsible for.
- Data Binding: React.js introduced a unidirectional data flow, which means that data flows in a single direction from parent components to child components. This approach simplifies data management and reduces the risk of data inconsistencies or bugs.
- Scalability: React.js is highly scalable and can be used to build applications of any size. It is particularly well-suited for building large-scale applications that require complex interfaces and frequent updates.
- Community Support: React.js has a large and active community that provides extensive documentation, third-party libraries, and tutorials. This makes it easy for developers to get started with React.js and to find solutions to common problems.
Overall, React.js brought several significant improvements over traditional client-side scripting using vanilla JavaScript and libraries like jQuery, as well as over other JavaScript frameworks like Backbone.js, AngularJS, and Knockout.js. These improvements have made it easier for developers to build scalable, efficient, and maintainable web applications.
If you want to dig deeper into this transition that happened between previous tools and frameworks like React, I recommend this video by uidotdev.
How React Works Under the Hood
React is a JavaScript library that works by creating a virtual representation of the user interface, called the Virtual DOM. This virtual representation is a lightweight copy of the actual DOM, and it allows React to efficiently manage and update the user interface.
When a React component is created, React generates a corresponding Virtual DOM tree that represents the component's current state. The Virtual DOM tree is essentially a JavaScript object that describes the structure of the user interface, including all of the HTML elements, their attributes, and their children.
When the state of a React component changes, React updates the corresponding Virtual DOM tree to reflect the new state. The updated Virtual DOM tree is then compared with the previous Virtual DOM tree to identify the differences between the two.
React then generates a list of minimal updates that need to be made to the actual DOM to bring it in sync with the new Virtual DOM tree. These updates are then applied to the actual DOM, resulting in an updated user interface.
One of the key benefits of this approach is that it allows React to update the user interface efficiently, without having to redraw the entire page. This can result in significant performance improvements, especially for complex applications with many components and frequent updates.
Another benefit of using a Virtual DOM is that it makes it easier to build reusable components. By abstracting away the details of the actual DOM, React components can be more easily composed together to build complex interfaces.
Overall, React's Virtual DOM approach allows for efficient and scalable user interface development, and it has played a significant role in the popularity of React as a front-end development framework.
How to Build a React App
Cool, so now that we have a clear idea of what React is and the improvements it brings to web development, let's actually start building applications!
Build a React App from Scratch using Webpack and Babel
We're going to see many different options available, but first we're going to build one from scratch. This means we're going to manually install and configure all the dependencies React needs to actually work.
Keep in mind this is a rare approach to use at the moment, since most apps are created through scripts that quickly take care of all this boilerplate. But the idea here is to see and understand the different components that interact to make React work under the hood.
To build a React app we'll need to install the 4 following dependencies:
Webpack: Webpack is a popular open-source module bundler for JavaScript applications. It takes multiple JavaScript files and their dependencies and packages them into a single optimized bundle for use in a web browser. It also has the capability to transform and bundle other types of assets such as CSS, images, and fonts.
Keep in mind that Webpack is just an option between many other available bundlers. We're going to use it because it's quite a standard option.
If you're interested in knowing more about JS modules and how to bundle them with Webpack, you can take a look at this article I wrote.
Babel: Babel is a popular open-source JavaScript compiler that allows developers to write code in the latest versions of JavaScript and translate it into code that can run on older browsers and environments. It supports the latest ECMAScript features and can also transpile other languages that compile to JavaScript, such as TypeScript and JSX.
Keep in mind Babel is just an option between many other available transpilers. We're going to use it because it's quite a standard option.
React: React is a JavaScript library for building user interfaces. It's focused on providing a declarative and efficient way to build complex UIs by breaking them into smaller, reusable components.
react-dom: React-DOM is a package that provides DOM-specific methods that React uses to interact with the browser's DOM (Document Object Model), such as rendering React components to the DOM, updating components, and handling user events.
So we have react and react-dom that provide the core functionalities of React, a bundler to unify all the different files into a few, and a transpiler to make our code compatible in most browsers. That's it. So now let's hop on to the code!
- Start a node project by running this command in your terminal:
npm init -y
- Install the following dependencies:
npm i webpack babel-loader @babel/preset-react @babel/core babel-preset-react html-webpack-plugin webpack-dev-server css-loader style-loader @babel/plugin-proposal-class-properties webpack-cli -D && npm i react react-dom -S
Here we're installing the 4 dependencies we previously mentioned and some extra plugins and stuff that help Webpack and Babel work.
Since we're doing this for theoretical foundation, we won't get too deep into these things. Just keep in mind the core dependencies are React's libraries, a bundler, and a transpiler (plus some other minor stuff).
If you're interested in a more detailed approach, you can take a look at this article.
- Now create an SRC folder and two
index.jsandindex.htmlfiles within it by running the next two commands:
mkdir src && cd src && touch index.js
touch index.html
- Hop onto the
index.htmlfile and put this within it:
<!doctype html>
<html lang=”en”>
<head>
 <meta charset=”utf-8">
 <title>My React App from Scratch</title>
</head>
<body>
 <div id=”app”></div>
</body>
</html>
This is the single HTML file that will be present in our project. When we finally build it, this is the file that will be sent to the client. Initially it will be just like we coded it (almost empty), and then React will do its magic and render all the content through JavaScript.
- Hop onto the
index.jsfile and put this within it:
import ReactDOM from ‘react-dom’;
import React from ‘react’;
const App = () => {
 return <h1>This is my React app!</h1>;
 }
ReactDOM.render(<App />, document.getElementById(‘app’));
Here we're creating a dummy component called App and telling react-dom to render it in the HTML element that has app as its id. See we just coded that element as a div in the previous step. ;)
- Now we need to add some config files for Babel and Webpack. In your root directory run the following:
touch .babelrc && touch webpack.config.js
- Inside your
webpack.config.jsfile put the following:
const HtmlWebPackPlugin = require(“html-webpack-plugin”);
const htmlPlugin = new HtmlWebPackPlugin({
 template: “./src/index.html”,
 filename: “./index.html”
});
module.exports = {
mode: ‘development’,
  module: {
    rules: [{
   test: /\.js$/,
   exclude: /node_modules/,
   use: {
     loader: “babel-loader”
   }
 },
  {
   test: /\.css$/,
   use: [“style-loader”, “css-loader”]
  }
]},
 plugins: [htmlPlugin]
};
- Inside your
.babelrcfile put the following:
{
 “presets”: [“@babel/preset-react”],
 “plugins”: [“@babel/plugin-proposal-class-properties”]
}
- Finally, go to your
package.jsonfile and add the following within thescriptssection:
"start": "webpack serve --config webpack.config.js"
At the end of all this, your file structure should look like this:
my-app-from-scratch/
┣ node_modules/
┣ src/
 ┣ index.html
 ┗ index.js
┣ .babelrc
┣ package-lock.json
┣ package.json
┗ webpack.config.js
And your package.json file should have this within it:
{
 “name”: “my-app-from-scratch “,
 “version”: “1.0.0”,
 “description”: “”,
 “main”: “webpack.config.js”,
 “scripts”: {
   “test”: “echo \”Error: no test specified\” && exit 1",
   "start": "webpack serve --config webpack.config.js"
},
 “keywords”: [],
 “author”: “”,
 “license”: “ISC”,
 “devDependencies”: {
 “@babel/preset-react”: “⁷.12.13”,
 “babel-core”: “⁶.26.3”,
 “babel-loader”: “⁸.2.2”,
 “babel-preset-react”: “⁶.24.1”,
 “css-loader”: “⁵.0.2”,
 “html-webpack-plugin”: “⁵.1.0”,
 “style-loader”: “².0.0”,
 “webpack”: “⁵.22.0”,
 “webpack-cli”: “⁴.5.0”,
 “webpack-dev-server”: “³.11.2”
 },
 “dependencies”: {
 “react”: “¹⁷.0.1”,
 “react-dom”: “¹⁷.0.1”
 }
}
Now if you run npm run start you should see your app coming alive! =D
What is CRA (create-react-app)?
As we've seen, setting up a React app from scratch is not THAT complicated. But it can be a pain in the butt to do all this every time you want to start a new project. Also, if you want some particular config for your bundler and transpilers, it can get tricky if you don't know your way around those tools.
And because of this problem, we got tools like Create-react-app (CRA). ;)
Create-React-App (CRA) is a popular and officially supported tool for creating React applications quickly and easily. It is a command-line interface (CLI) tool that automates the setup of a new React project by generating a basic file structure, configuration files, and build scripts.
CRA provides a streamlined development experience by setting up a preconfigured development server, live-reloading, and automatic build optimization for production. It also comes with a built-in tool for running tests and generating code coverage reports.
Using CRA, developers can create a new React application with a single command, without having to manually set up configuration files or install and configure build tools. This allows developers to focus on writing code and building their application, rather than spending time on setup and configuration.
CRA also provides a set of default project configurations, such as Webpack and Babel, which are optimized for creating React applications. This means that developers can get started quickly with a project that is optimized for performance, maintainability, and scalability.
Overall, Create-React-App is a powerful tool that simplifies the process of setting up and configuring a new React project.
How to build an app with create-react-app
Starting a React app with CRA is dead easy. We just run npx create-react-app <appName> and on its own it will set up all the boilerplate for us.
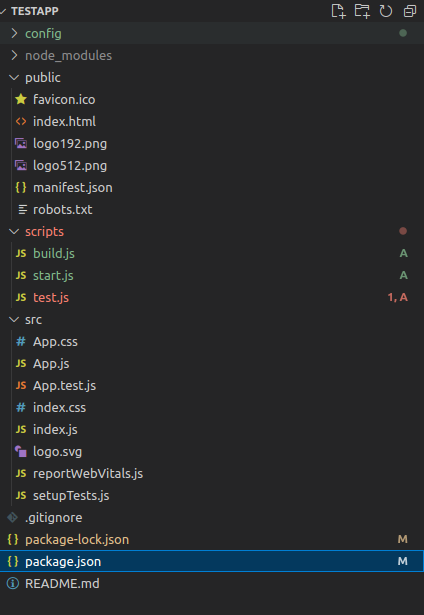
After it runs, your folder structure should look like this:

And your package.json should contain the following:
{
  "name": "testapp",
  "version": "0.1.0",
  "private": true,
  "dependencies": {
    "@testing-library/jest-dom": "^5.16.5",
    "@testing-library/react": "^13.4.0",
    "@testing-library/user-event": "^13.5.0",
    "react": "^18.2.0",
    "react-dom": "^18.2.0",
    "react-scripts": "5.0.1",
    "web-vitals": "^2.1.4"
  },
  "scripts": {
    "start": "react-scripts start",
    "build": "react-scripts build",
    "test": "react-scripts test",
    "eject": "react-scripts eject"
  },
  "eslintConfig": {
    "extends": [
      "react-app",
      "react-app/jest"
    ]
  },
  "browserslist": {
    "production": [
      ">0.2%",
      "not dead",
      "not op_mini all"
    ],
    "development": [
      "last 1 chrome version",
      "last 1 firefox version",
      "last 1 safari version"
    ]
  }
}
You might be wondering, well where are the Webpack and Babel things, right? Well, since CRA takes care of this stuff under the hood, they are initially hidden. If we want to see this hidden files and folders, we can run npm run eject.
You can now see that the folder structure has a few more things in it:
And your package.json file contains the whole list of dependencies:
  "name": "testapp",
  "version": "0.1.0",
  "private": true,
  "dependencies": {
    "@babel/core": "^7.16.0",
    "@pmmmwh/react-refresh-webpack-plugin": "^0.5.3",
    "@svgr/webpack": "^5.5.0",
    "@testing-library/jest-dom": "^5.16.5",
    "@testing-library/react": "^13.4.0",
    "@testing-library/user-event": "^13.5.0",
    "babel-jest": "^27.4.2",
    "babel-loader": "^8.2.3",
    "babel-plugin-named-asset-import": "^0.3.8",
    "babel-preset-react-app": "^10.0.1",
    "bfj": "^7.0.2",
    "browserslist": "^4.18.1",
    "camelcase": "^6.2.1",
    "case-sensitive-paths-webpack-plugin": "^2.4.0",
    "css-loader": "^6.5.1",
    "css-minimizer-webpack-plugin": "^3.2.0",
    "dotenv": "^10.0.0",
    "dotenv-expand": "^5.1.0",
    "eslint": "^8.3.0",
    "eslint-config-react-app": "^7.0.1",
    "eslint-webpack-plugin": "^3.1.1",
    "file-loader": "^6.2.0",
    "fs-extra": "^10.0.0",
    "html-webpack-plugin": "^5.5.0",
    "identity-obj-proxy": "^3.0.0",
    "jest": "^27.4.3",
    "jest-resolve": "^27.4.2",
    "jest-watch-typeahead": "^1.0.0",
    "mini-css-extract-plugin": "^2.4.5",
    "postcss": "^8.4.4",
    "postcss-flexbugs-fixes": "^5.0.2",
    "postcss-loader": "^6.2.1",
    "postcss-normalize": "^10.0.1",
    "postcss-preset-env": "^7.0.1",
    "prompts": "^2.4.2",
    "react": "^18.2.0",
    "react-app-polyfill": "^3.0.0",
    "react-dev-utils": "^12.0.1",
    "react-dom": "^18.2.0",
    "react-refresh": "^0.11.0",
    "resolve": "^1.20.0",
    "resolve-url-loader": "^4.0.0",
    "sass-loader": "^12.3.0",
    "semver": "^7.3.5",
    "source-map-loader": "^3.0.0",
    "style-loader": "^3.3.1",
    "tailwindcss": "^3.0.2",
    "terser-webpack-plugin": "^5.2.5",
    "web-vitals": "^2.1.4",
    "webpack": "^5.64.4",
    "webpack-dev-server": "^4.6.0",
    "webpack-manifest-plugin": "^4.0.2",
    "workbox-webpack-plugin": "^6.4.1"
  },
  "scripts": {
    "start": "node scripts/start.js",
    "build": "node scripts/build.js",
    "test": "node scripts/test.js"
  },
  "eslintConfig": {
    "extends": [
      "react-app",
      "react-app/jest"
    ]
  },
  "browserslist": {
    "production": [
      ">0.2%",
      "not dead",
      "not op_mini all"
    ],
    "development": [
      "last 1 chrome version",
      "last 1 firefox version",
      "last 1 safari version"
    ]
  },
  "jest": {
    "roots": [
      "<rootDir>/src"
    ],
    "collectCoverageFrom": [
      "src/**/*.{js,jsx,ts,tsx}",
      "!src/**/*.d.ts"
    ],
    "setupFiles": [
      "react-app-polyfill/jsdom"
    ],
    "setupFilesAfterEnv": [
      "<rootDir>/src/setupTests.js"
    ],
    "testMatch": [
      "<rootDir>/src/**/__tests__/**/*.{js,jsx,ts,tsx}",
      "<rootDir>/src/**/*.{spec,test}.{js,jsx,ts,tsx}"
    ],
    "testEnvironment": "jsdom",
    "transform": {
      "^.+\\.(js|jsx|mjs|cjs|ts|tsx)$": "<rootDir>/config/jest/babelTransform.js",
      "^.+\\.css$": "<rootDir>/config/jest/cssTransform.js",
      "^(?!.*\\.(js|jsx|mjs|cjs|ts|tsx|css|json)$)": "<rootDir>/config/jest/fileTransform.js"
    },
    "transformIgnorePatterns": [
      "[/\\\\]node_modules[/\\\\].+\\.(js|jsx|mjs|cjs|ts|tsx)$",
      "^.+\\.module\\.(css|sass|scss)$"
    ],
    "modulePaths": [],
    "moduleNameMapper": {
      "^react-native$": "react-native-web",
      "^.+\\.module\\.(css|sass|scss)$": "identity-obj-proxy"
    },
    "moduleFileExtensions": [
      "web.js",
      "js",
      "web.ts",
      "ts",
      "web.tsx",
      "tsx",
      "json",
      "web.jsx",
      "jsx",
      "node"
    ],
    "watchPlugins": [
      "jest-watch-typeahead/filename",
      "jest-watch-typeahead/testname"
    ],
    "resetMocks": true
  },
  "babel": {
    "presets": [
      "react-app"
    ]
  }
}
Once again, if you run npm start you'll see your app coming alive. ;)
What is Vite?
CRA sounds pretty cool, right? It was a really helpful tool for React devs, since it brought a big improvement over building apps from scratch.
But the problem with create-react-app is it's kind of slow. Especially in large applications, that have thousands of lines of code and hundreds of components and files, tools like Webpack take a long time to bundle and build the application. This is the kind of problem that tools like Vite.js have come to solve.
For further info on why CRA is not the best building tool available today, I recommend this video and this video.
Vite.js is a build tool and development server that is designed to optimize the development experience for modern web applications. It was created by Evan You, the creator of the popular JavaScript framework Vue.js.
Vite.js is built on top of native ES modules, which allows for faster and more efficient module loading during development. This means that the development server can start up quickly and changes to the code can be reflected instantly in the browser, without the need for a full page reload.
Vite.js also includes a number of other features that are designed to streamline the development process. For example, it includes built-in support for TypeScript, CSS preprocessors, and hot module replacement. This allows for changes to be made to the code without the need for a full page reload.
Another key feature of Vite.js is its optimized production build process. Vite.js generates highly optimized production builds that leverage modern browser features such as code splitting, lazy loading, and tree shaking to reduce the size of the final bundle and improve performance.
Overall, Vite.js is a powerful and modern build tool that is designed to streamline the development process and improve performance for modern web applications. While it was originally designed for use with Vue.js, you can use it with other modern front-end frameworks such as React and Svelte.
Vite.js vs Create React App
Vite.js and Create React App (CRA) are both build tools and development servers that are designed to improve the development experience for React applications. While there is some overlap in their functionality, there are also some key differences between the two tools.
Some of the improvements that Vite.js brings over Create React App include:
- Faster development server: Vite.js leverages native ES modules to provide a faster and more efficient development server. This means that changes to the code can be reflected instantly in the browser without the need for a full page reload. CRA, on the other hand, uses Webpack to power its development server, which can be slower and less efficient.
- Faster build times: Vite.js generates highly optimized production builds that leverage modern browser features such as code splitting, lazy loading, and tree shaking to reduce the size of the final bundle and improve performance. This can result in significantly faster build times compared to CRA.
- Support for other frameworks: While CRA is designed specifically for React applications, Vite.js can be used with other modern front-end frameworks such as Vue.js, Svelte, and others. This makes Vite.js a more versatile tool for front-end development.
- Built-in support for TypeScript: Vite.js includes built-in support for TypeScript, which can simplify the development process for projects that use TypeScript.
- Simplified configuration: Vite.js uses a simple and intuitive configuration format that makes it easy to get started with the tool. CRA, on the other hand, can require more complex configuration for some use cases.
Overall, Vite.js provides a number of improvements over Create React App in terms of performance, versatility, and ease of use. But both tools have their strengths and weaknesses, and the best tool for a particular project will depend on the specific requirements and constraints of that project.
How to build an app with Vite
To create a React app with Vite, go to your command line and run npm createvite@latest.
Then follow the prompts in your command line (it will ask you to provide the project name and the kind of template you'd like to start with). After selecting the options of using React and JavaScript, your folder structure should look somewhat like this:

See that it's quite similar to the one generated by CRA.
And this will be your package.json:
{
  "name": "vite-project",
  "private": true,
  "version": "0.0.0",
  "type": "module",
  "scripts": {
    "dev": "vite",
    "build": "vite build",
    "preview": "vite preview"
  },
  "dependencies": {
    "react": "^18.2.0",
    "react-dom": "^18.2.0"
  },
  "devDependencies": {
    "@types/react": "^18.0.27",
    "@types/react-dom": "^18.0.10",
    "@vitejs/plugin-react": "^3.1.0",
    "vite": "^4.1.0"
  }
}
To start your app, just run npm run dev and you're ready to go!
Vite is a great option for building React apps nowadays. It gives us all the simplicity and convenience that CRA gave us, plus some big optimizations over what CRA did. But one thing it doesn't have is out of the box support for SSR (server side rendering).
To understand why that matters, we're going to go through a brief explanation of what CSR (client side rendering) and SSR are, and in which situations one might be more beneficial than the other. And then we're going to take a look at two tools that actually provide support for SSR with React.
Client Side Rendering (CSR) vs Server Side Rendering (SSR)
Client-side rendering (CSR) and server-side rendering (SSR) are two approaches to rendering web pages in web development.
Client-side rendering involves generating HTML and rendering a web page entirely in the client's web browser using JavaScript.
In CSR, the client requests a minimal HTML file that includes links to JavaScript and CSS files. The client's browser then fetches the necessary files, executes the JavaScript, and updates the DOM to render the web page.
This approach is often used for single-page applications (SPAs) where the content is dynamically generated and changes frequently. Client-side rendering can provide a faster and more interactive user experience as the browser can update the UI without reloading the page.
Server-side rendering, on the other hand, involves generating the complete HTML of a web page on the server-side before sending it to the client's browser.
In SSR, the server processes the request, fetches the data, generates the HTML, and sends the fully-rendered HTML to the client. This approach is often used for content-heavy websites that require search engine optimization (SEO) or where the content changes infrequently.
Server-side rendering can provide a better initial loading speed and SEO as the search engine crawlers can read the complete HTML content.
The choice between CSR and SSR depends on the specific requirements and constraints of a project.
Client-side rendering might be more convenient for applications that require dynamic content and interactive user interfaces. On the other hand, server-side rendering might be more suitable for content-heavy websites that need to be SEO-friendly or for projects that require good initial loading times, especially for users with slow internet connections or older devices.
Some projects might even use a hybrid approach, where they combine both CSR and SSR to achieve the best of both worlds.
If you're interested in further exploring the many rendering options available in web development, you can refer to the article I recently wrote about rendering patterns.
SSR Building Tools
What is Astro?
Astro is a modern static site generator and web development framework that allows developers to build fast and efficient websites and web applications using a combination of server-side rendering and client-side rendering.
Astro uses a modular architecture that allows developers to mix and match different rendering strategies, allowing for maximum flexibility and performance.
For example, Astro supports server-side rendering (SSR) for initial page loads, which can improve performance and SEO, while also supporting client-side rendering (CSR) for subsequent interactions, which can provide a more interactive and dynamic user experience.
In addition to its flexible rendering capabilities, Astro also includes a number of other features that make it a powerful tool for web development. These include:
- Built-in support for popular front-end frameworks such as React, Vue.js, and Svelte.
- A powerful build system that is designed to optimize performance and minimize bundle sizes.
- A flexible component model that allows developers to build reusable UI components and layouts.
- A built-in development server and hot reloading that allows for fast and efficient development.
- Support for a wide range of web technologies, including HTML, CSS, JavaScript, Markdown, and more.
Overall, Astro is a powerful and versatile tool for building modern static sites and web applications. Its flexible rendering model, powerful build system, and support for popular front-end frameworks make it a great choice for developers who want to build fast, efficient, and engaging web experiences.
How to build an app with Astro
To build an app with Astro we can run the command npm create astro@latest.
Then follow the prompts in your command line (it will ask you to provide the project name and the kind of template you'd like to start with). After completing that, your folder structure will look like this:

And this will be your package.json:
{
  "name": "satellite-series",
  "type": "module",
  "version": "0.0.1",
  "scripts": {
    "dev": "astro dev",
    "start": "astro dev",
    "build": "astro build",
    "preview": "astro preview",
    "astro": "astro"
  },
  "dependencies": {
    "@astrojs/react": "^2.0.2",
    "@types/react": "^18.0.28",
    "@types/react-dom": "^18.0.11",
    "astro": "^2.0.17",
    "react": "^18.2.0",
    "react-dom": "^18.2.0"
  }
}
From the Astro docs we can see how the project structure works:
src/components: Components are reusable units of code for your HTML pages. These could be Astro components, or UI framework components like React or Vue. It is common to group and organize all of your project components together in this folder.
src/layouts: Layouts are a special kind of component that wrap some content in a larger page layout. These are most often used by Astro pages and Markdown or MDX pages to define the layout of the page. Just like src/components, this directory is a common convention but not required.
src/pages: Pages are a special kind of component used to create new pages on your site. A page can be an Astro component, or a Markdown file that represents some page of content for your site. src/pages is a required sub-directory in your Astro project. Without it, your site will have no pages or routes!
src/styles: It is a common convention to store your CSS or Sass files in a src/styles directory, but this is not required. As long as your styles live somewhere in the src/ directory and are imported correctly, Astro will handle and optimize them.
public/: The public/ directory is for files and assets that do not need to be processed during Astro’s build process. These files will be copied into the build folder untouched.
This behavior makes public/ ideal for common assets like images and fonts, or special files such as robots.txt and manifest.webmanifest.
You can place CSS and JavaScript in your public/ directory, but be aware that those files will not be bundled or optimized in your final build.
As you can see, Astro adds features on top of what React offers (like bundling optimization, Astro components, and out-of-the-box routing). This is what people call a "metaframework" (we'll take a closer look at that later on).
If you'd like to get a more detailed overview of how Astro works, I recommend you check out their docs. They're really well-written and easy to follow.
What is Gatsby?
Gatsby is a modern web framework based on React that allows developers to build fast, dynamic websites and applications using the latest web technologies. It was initially released in 2015 by Kyle Mathews, and has since grown to become one of the most popular static site generators and web frameworks in the world.
One of the main characteristics of Gatsby is its focus on performance and speed. Gatsby uses a technique called pre-rendering to generate static HTML, CSS, and JavaScript files that can be served to users almost instantly, resulting in a faster and more responsive user experience.
Also, Gatsby's use of React.js allows developers to create highly dynamic and interactive web applications that feel like native apps.
Gatsby also offers a powerful plugin system that makes it easy to add new features and functionality to your website or application. Gatsby plugins can help with everything from optimizing images and improving performance to integrating with external services and databases.
Some of the pros of using Gatsby include:
- Fast and responsive user experience: Gatsby's use of pre-rendering and React.js makes for a highly performant and responsive user experience.
- Large and active community: Gatsby has a large and active community of developers and contributors, which means there are plenty of resources and support available.
- Plugin system: Gatsby's plugin system makes it easy to add new features and functionality to your website or application without having to write custom code.
- Integration with external services: Gatsby can easily integrate with external services and databases, making it a good choice for applications that need to access and process data from a variety of sources.
Some of the cons of using Gatsby include:
- Steep learning curve: Gatsby can be complex and difficult to learn for developers who are new to React or web development in general.
- Limited server-side rendering: Gatsby's use of pre-rendering means that it may not be the best choice for applications that require extensive server-side rendering.
- Static site limitations: Because Gatsby generates static files, it may not be the best choice for applications that require frequent database updates or real-time data.
Gatsby is a good choice for a wide variety of web applications, including blogs, e-commerce sites, marketing sites, and other content-driven websites. It is particularly well-suited for applications that require fast page loads and a highly performant user experience, as well as applications that need to integrate with external services and databases.
How to build an app with Gatsby
To initiate a Gatsby project, run npm init gatsby and follow the CLI prompts.
Your folder structure might look something like this:
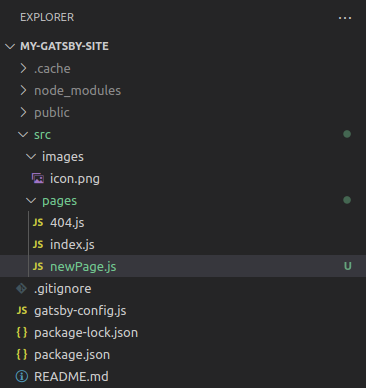
Within the pages folder we have a file for each of the site's pages. Gatsby works with out-of-the box routing just like Astro.
A typical React front-end application project that uses Gatsby.js as the static site generator will have the following structure:
src/folder: This folder contains all the source code of the application. It usually includes sub-folders for pages, components, images, styles, and data.gatsby-config.js: This file contains the configuration settings for Gatsby. It includes metadata such as the site title, description, and author, as well as settings for plugins and other features.public/folder: This folder contains the compiled static assets that Gatsby generates when the site is built. These assets can be deployed to a web server or CDN.
React's Metaframeworks
React's metaframeworks are high-level frameworks that provide additional abstractions and functionality on top of the React library.
They are designed to simplify the development of complex applications and provide additional features and functionality that are not available in the React library alone.
Some examples of React.js metaframeworks include:
- Next.js: Next.js is a metaframework that provides server-side rendering, automatic code splitting, and simplified client-side routing. It also includes built-in support for static site generation, API routes, and other advanced features.
- Remix: Remix is a metaframework for building server-rendered React applications. It provides a unified data management system, a simple and intuitive routing system, and other features that can simplify building complex web applications. Remix aims to improve developer productivity by providing a simpler, more streamlined development experience for building large, complex web applications.
Overall, React.js metaframeworks provide powerful abstractions and functionality that can simplify the development of complex applications and help developers to build high-quality, efficient, and maintainable code.
Side comment: Astro and Gatsby might be considered metaframeworks as well. I just put them in a different section to introduce what SSR is, and also considering that Next and Remix provide more extra features on top of React than the other two.
What is Next.js?
Next.js is a popular metaframework for building server-side rendered (SSR) React applications. It is an open-source project developed by Vercel (formerly Zeit) and has gained popularity due to its ease of use, performance, and flexibility.
Next.js provides a number of features out of the box, such as automatic code splitting, server-side rendering, and hot module replacement. It also has built-in support for various front-end features, including client-side routing, static file serving, and API routes.
One of the main advantages of Next.js is its support for server-side rendering, which can improve the performance and SEO of web applications. With Next.js, the initial HTML is generated on the server, which can then be quickly hydrated with JavaScript on the client side.
If you wander what "hydration" means, again you can refer to the article I wrote about rendering patterns. ;)
Next.js also supports static site generation, where pages can be pre-built and served statically for faster performance and reduced server load. This feature makes it easy to build fast, scalable, and SEO-friendly sites with Next.js.
In addition to these features, Next.js has a large and active community that provides many plugins and tools to extend its functionality. It is also designed to be easy to use, with a simple setup process and a well-documented API.
Another interesting thing to mention is that the Next developer team works hand-in-hand with the React developer team, so both the Next framework and the React library are very well integrated and take advantage of each other's latest features.
Overall, Next.js is a powerful and flexible tool for building modern web applications with React. Its support for server-side rendering and static site generation make it a popular choice for developers looking to optimize their web applications for performance and SEO.
How to build an app with Next.js
To create a Next app, we can run the following command: npx create-next-app@latest <appName>. Then follow the prompts in your command line.
Your folder structure might look something like this:

A typical React front-end application project that uses Next.js as the framework will have the following structure:
pages/folder: This folder contains all the pages of the application. Each file in this folder represents a route in the application, and the file name corresponds to the route path. For example, a file namedindex.jsrepresents the root route (/), and a file namedabout.jsrepresents the/aboutroute.public/folder: This folder contains the static assets that are served directly by the web server, such as images, videos, and fonts.styles/folder: This folder contains all the styles of the application. It includes global styles, such as the font family and color scheme, as well as component-specific styles.next.config.js: This file contains the configuration settings for Next.js. It can be used to customize features such as webpack, CSS, and image handling.
For a deeper dive into how Next works, refer to their awesome docs.
What is Remix?
Remix is a metaframework for building server-rendered React applications. It is an open-source project developed by the team at Remix Software, and it aims to provide a simpler and more unified approach to building server-rendered React applications.
One of the main features of Remix is its focus on code splitting and lazy loading. It automatically code splits your application into small chunks that are loaded on demand. This can improve performance and reduce the initial load time of your application.
Remix also provides a unified data management system, which makes it easy to manage the data your application needs to function. With Remix, you can define your data requirements in one place and fetch them on the server or client as needed.
Another key feature of Remix is its routing system, which is designed to be simple and intuitive. You can define your routes using a declarative API, and Remix will automatically generate the necessary code to handle client-side and server-side rendering.
Remix also provides built-in support for authentication, authorization, and other common web application features. It is highly extensible, with a plugin system that makes it easy to add custom functionality to your application.
Overall, Remix is a powerful and flexible metaframework for building server-rendered React applications. Its focus on code splitting, data management, and routing make it easy to build fast, scalable, and maintainable applications.
How to build an app with Remix
To create a Remix app, we can run the following command: npx create-remix@latest Then follow the prompts in your command line.
Your folder structure might look something like this:

A typical React front-end application project that uses Remix as the framework will have the following structure:
public/: This directory contains the publicly accessible files of the application, such as the index.html file and other assets like images, fonts, etc.app/: This directory contains the source code of the application.routes.js: This file defines the routes of the application and maps them to the corresponding page components.remix.config.js: This file contains configuration options for Remix.js, such as setting up server-side rendering and defining routes.
For a deeper dive into how Next works, refer to their docs.
Wrapping Up
There are several popular React.js build tools available, each with its own unique set of features and advantages.
Here is a comparison of the main characteristics, pros, and cons of five popular React.js build tools: create-react-app, Vite, Astro, Gatsby, Next.js, and Remix.
create-react-app:
- Characteristics: A command-line tool that sets up a basic React application with a simple file structure and build process.
- Pros: Easy to use, with a simple setup process and no configuration required. Provides a good starting point for new React projects.
- Cons: Limited flexibility and customization options. May not be suitable for larger or more complex projects.
- Best for: Small to medium-sized projects with straightforward requirements.
Vite:
- Characteristics: A fast build tool that leverages modern browser features to provide fast development and build times.
- Pros: Extremely fast, with instant hot module replacement and other optimizations for faster builds. Supports a wide range of front-end frameworks and technologies.
- Cons: Less mature than some other tools, with a smaller community and fewer available plugins.
- Best for: Modern, fast-paced development workflows with a focus on speed and efficiency.
Astro:
- Characteristics: A static site generator that can be used with React and other front-end frameworks.
- Pros: Extremely fast, with a focus on generating static sites that can be deployed anywhere. Provides a simple, intuitive API for building static sites.
- Cons: Less mature than some other tools, with a smaller community and fewer available plugins. May not be suitable for dynamic applications or complex routing needs.
- Best for: Static sites or simple web applications that can be generated and served statically.
Gatsby:
- Main characteristics: Gatsby is a popular static site generator that uses React to create fast and performant websites and applications. It includes a powerful plugin system for adding new features and functionality, and supports features like server-side rendering and data sourcing from a variety of APIs and databases.
- Pros: Highly performant, powerful plugin system, good for content-driven websites and applications.
- Cons: May be more limited in terms of dynamic data updates and real-time data.
- Best for: Projects that require fast and performant content-driven websites or applications, or for developers who prefer a static site architecture.
Next.js:
- Characteristics: A metaframework for building server-rendered React applications.
- Pros: Provides built-in support for server-side rendering, static site generation, and other features that can improve performance and SEO. Has a large and active community with many available plugins and tools.
- Cons: Can be more complex to set up and configure than some other tools. May not be suitable for smaller or simpler projects.
- Best for: Large, complex web applications with complex routing, data management, or SEO requirements.
Remix:
- Characteristics: A metaframework for building server-rendered React applications.
- Pros: Provides a unified data management system, a simple and intuitive routing system, and other features that can simplify building complex web applications. Has a plugin system that makes it easy to add custom functionality to your application.
- Cons: Less mature than some other tools, with a smaller community and fewer available plugins.
- Best for: Large, complex web applications with complex data management, routing, or other requirements.
Overall, the best choice of React.js build tool depends on the specific needs of your project.
For small to medium-sized projects with straightforward requirements and fast-paced development workflows with a focus on speed and efficiency, Vite may be the best choice due to its simplicity and ease of use.
For static sites or simple web applications that can be generated and served statically, Astro may be the best choice.
And for larger, more complex projects with complex routing, data management, or SEO requirements, Next.js may be a better choice.
Well everyone, that's all for today. As always, I hope you enjoyed the article and learned something new.
If you want, you can also follow me on LinkedIn or Twitter. See you in the next one!
