
In JavaScript, we use objects to store multiple values as a complex data structure. There are hardly any JavaScript applications that do not deal with objects.
Web developers commonly extract values from an object property to use further in programming logic. With ES6, JavaScript introduced object destructuring to make it easy to create variables from an object's properties.
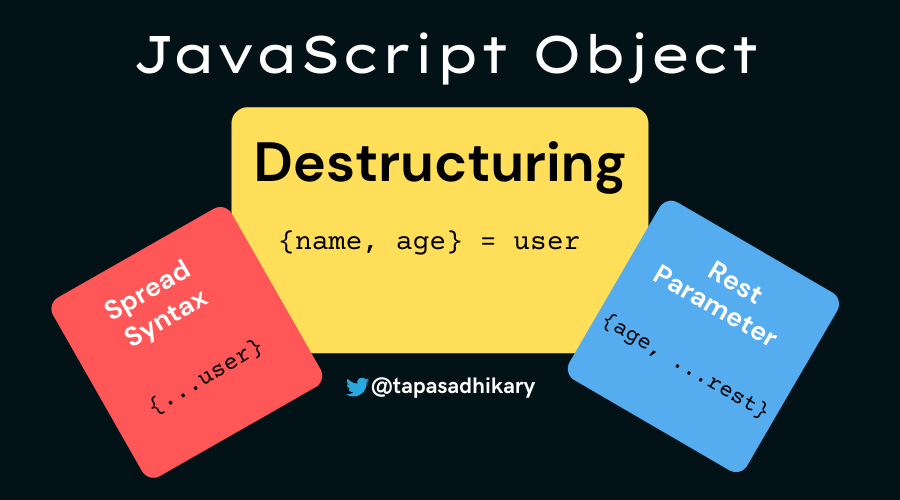
In this article, we will learn about object destructuring by going through many practical examples. We will also learn how to use the spread syntax and the rest parameter. I hope you enjoy it.
Object Destructuring in JavaScript
We create objects with curly braces {…} and a list of properties. A property is a key-value pair where the key must be a string or a symbol, and the value can be of any type, including another object.
const user = {
    'name': 'Alex',
    'address': '15th Park Avenue',
    'age': 43
}
Here we have created a user object with three properties: name, address, and age. The real need in programming is to extract these property values and assign them to a variable.
For example, if we want to get the value of the name and age properties from the user object, we can do this:
let name = user.name;
let age = user.age;
console.log(name, age);
This is undoubtedly a bit more typing. We have to explicitly mention the name and age property with the user object in dot(.) notation, then declare variables accordingly and assign them.
We can simplify this process using the new object destructuring syntax introduced in ES6.
JavaScript Object Destructuring is the syntax for extracting values from an object property and assigning them to a variable. The destructuring is also possible for JavaScript Arrays.
By default, the object key name becomes the variable that holds the respective value. So no extra code is required to create another variable for value assignment. Let's see how this works with examples.
Basic Object Destructuring Example
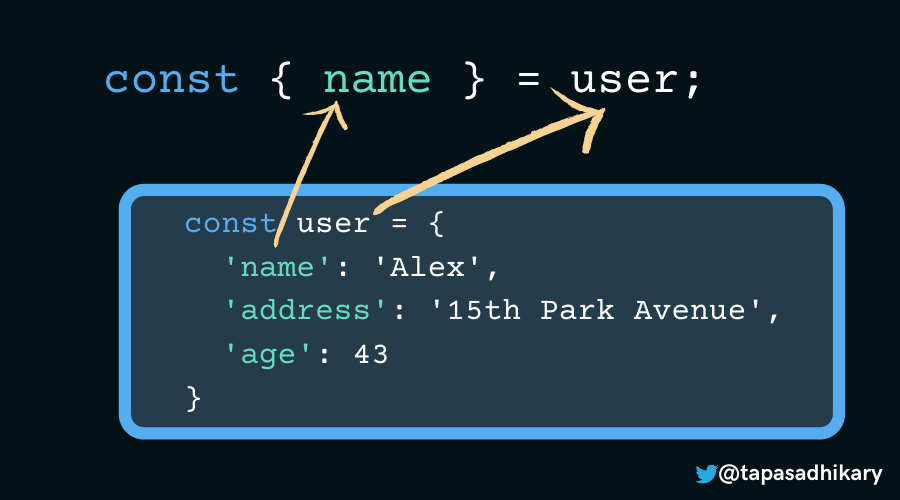
Let's take the same user object that we referred to above.
const user = {
    'name': 'Alex',
    'address': '15th Park Avenue',
    'age': 43
}
The expression to extract the name property value using object destructuring is the following:
const { name } = user;

console.log(name); // Output, Alex
As you see, on the left side of the expression, we pick the object property key (name in this case) and place it inside the {}. It also becomes the variable name to hold the property value.
The right side of the expression is the actual object that extracts the value. We also mention the keywords, const, let and so on to specify the variable's scope.
So, how do we extract values from more than one object property? Simple – we keep adding the object keys inside the {} with commas separating them. In the example below, we destructure both the name and age properties from the user object.
const user = {
    'name': 'Alex',
    'address': '15th Park Avenue',
    'age': 43
}

const { name, age } = user;

console.log(name, age); // Output, Alex 43
Variable Declaration Rule
The keywords let and const are significant in object destructuring syntax. Consider the example below where we have omitted the let or const keyword. It will end up in the error, Uncaught SyntaxError: Unexpected token '='.
const user = {
    'name': 'Alex',
    'address': '15th Park Avenue',
    'age': 43
}

{ name  } = user // Uncaught SyntaxError: Unexpected token '='
What if we declare the variable in advance and then try to destructure the same name's key from the object? Nope, not much luck here either. It is still syntactically incorrect.
let name;

{ name  } = user; // Uncaught SyntaxError: Unexpected token '='
In this case, the correct syntax is to put the destructuring expression inside parenthesis ((...)).
Please note that the parenthesis are required when you want to omit the let or const keyword in the destructuring expression itself.
let name;

({ name  } = user);

console.log(name); // Output, Alex
Add a New Variable & Default Value
We can add a new variable while destructuring and add a default value to it. In the example below, the salary variable is non-existent in the user object. But we can add it in the destructuring expression and add a default value to it.
const user = {
    'name': 'Alex',
    'address': '15th Park Avenue',
    'age': 43
}
const { name, age, salary=123455 } = user;

console.log(name, age, salary); // Output, Alex 43 123455
The alternative way to do the above is this:
let salary = user.salary ? user.salary : 123455;There is a considerable advantage to the flexibility of adding a variable with a default value. The default value of this new variable is not necessarily going to be any constant value always. We can compute the value of it from other destructured property values.
Let's take a user object with two properties, first_name and last_name. We can now compute the value of a non-existent full_name using these two properties.
const user = {
    'first_name': 'Alex',
    'last_name': 'Brandos',
}
const { first_name, last_name, full_name=`${first_name} ${last_name}` } = user;

console.log(full_name); // Output, Alex Brandos
Isn't that elegant and useful!
Add Aliases
You can give an alias name to your destructured variables. It comes in very handy if you want to reduce the chances of variable name conflicts.
In the example below, we have specified an alias name for the property address as permanentAddress.
const user = {
    'name': 'Alex',
    'address': '15th Park Avenue',
    'age': 43
}

const { address: permanentAddress } = user;

console.log(permanentAddress); // 15th Park Avenue
Please note, an attempt to access the variable address here will result in this error:

Nested Object Destructuring
An object can be nested. This means that the value of an object property can be another object, and so on.
Let's consider the user object below. It has a property called department with the value as another object. But let's not stop here! The department has a property with the key address whose value is another object. Quite a real-life scenario, isn't it?
const user = {
        'name': 'Alex',
        'address': '15th Park Avenue',
        'age': 43,
        'department':{
            'name': 'Sales',
            'Shift': 'Morning',
            'address': {
                'city': 'Bangalore',
                'street': '7th Residency Rd',
                'zip': 560001
            }
        }
}
How do we extract the value of the department property? Ok, it should be straight-forward by now.
const { department } = user;And here's the output when you log department:

But, let's go one more nested level down. How do we extract the value of the address property of the department? Now, this may sound a bit tricky. However, if you apply the same object destructuring principles, you'll see that it's similar.
const { department: { address } } = user;Here's the output when you log address:

In this case, department is the key we focus on and we destructure the address value from it. Notice the {} around the keys you want to destructure.
Now it's time to take it to the next level. How do we extract the value of city from the department's address? Same principle again!
const { department: { address: { city } } } = user; The output when you log city is "Bangalore".
It can go any level nested down.
The rule of thumb is to start with the top-level and go down in the hierarchy until you reach the value you want to extract.
Dynamic Name Property
Many times you may not know the property name (key) of an object while destructuring it. Consider this example. We have a user object:
const user = {
    'name': 'Alex',
    'address': '15th Park Avenue',
    'age': 43
}
Now the method getValue(key) takes a property key name and should return the value of it.
getValue('name') // Should return Alex
getValue('age') // Should return 43
So, how do we write the definition of the getValue(key) method using the destructuring syntax?
Well, the syntax is very much the same as creating aliases. As we don't know the key name to hard-code in the destructuring syntax, we have to enclose it with square brackets ([...]).
const getValue = key => {
    const { [key]: returnValue } = user;
    return returnValue;
}
Destructure to the Function Parameter
This one is my favorites, and it practically reduces lots of unnecessary code. You may want just a couple of specific property values to pass as a parameter to the function definition, not the entire object. Use object destructuring to function parameter in this case.
Let's take the user object example once again.
const user = {
    'name': 'Alex',
    'address': '15th Park Avenue',
    'age': 43
}
Suppose we need a function to return a string using the user's name and age. Say something like Alex is 43 year(s) old! is the return value when we call this:
logDetails(user); We can simply use destructuring here to pass the name and age values, respectively, to the function definition. There is no need to pass the entire user object and then extract the values from it one by one. Please have a look:
function logDetails({name, age}) {
    console.log(`${name} is ${age} year(s) old!`)
}
Destructure Function Return Value
When a function returns an object and you are interested in specific property values, use destructuring straight away. Here is an example:
const getUser = () => {
    return{
        'name': 'Alex',
        'address': '15th Park Avenue',
        'age': 43
    }
}

const { name, age } = getUser();

console.log(name, age); // Alex 43
It is similar to the basic object destructuring we saw in the beginning.
Destructure in Loops
You can use object destructuring with the for-of loop. Let's take an array of user objects like this:
const users = [
    {
        'name': 'Alex',
        'address': '15th Park Avenue',
        'age': 43
    },
    {
        'name': 'Bob',
        'address': 'Canada',
        'age': 53
    },
    {
        'name': 'Carl',
        'address': 'Bangalore',
        'age': 26
    }
];
We can extract the property values with object destructuring using the for-of loop.
for(let { name, age } of users) {
    console.log(`${name} is ${age} years old!`);
}
This is the output:

The Console object
In JavaScript, console is a built-in object supported by all browsers. If you have noticed, the console object has many properties and methods, and some are very popular, like console.log().

Using the destructuring object syntax, we can simplify the uses of these methods and properties in our code. How about this?
const { log, warn, error } = console;

log('I log into the browser console');
warn('I am a warning');
error('I am an error');
Spread Syntax in JavaScript
The Spread Syntax (also known as the Spread Operator) is another excellent feature of ES6. As the name indicates, it takes an iterable (like an array) and expands (spreads) it into individual elements.
We can also expand objects using the spread syntax and copy its enumerable properties to a new object.
Spread syntax helps us clone an object with the most straightforward syntax using the curly braces and three dots {...}.
const clone_some_object = {...some_object}With spread syntax we can clone, update, and merge objects in an immutable way. The immutability helps reduce any accidental or unintentional changes to the original (Source) object.
The Object Destructuring and Spread syntaxes are not the same thing in JavaScript.
Create a Clone of an Object
We can create a cloned instance of an object using the spread syntax like this:
const user = {
    'name': 'Alex',
    'address': '15th Park Avenue',
    'age': 43
}

const clone = {...user} // Output, {name: "Alex", address: "15th Park Avenue", age: 43}

clone === user; // Output, false
You can alternatively use object.assign() to create a clone of an object. However, the spread syntax is much more precise and much shorter.
The spread syntax performs a shallow copy of the object. This means that none of the nested object instances are cloned.
Add Properties to Objects
We can add a new property (key-value pair) to the object using the spread syntax. Note that the actual object never gets changed. The new property gets added to the cloned object.
In the example below, we are adding a new property (salary) using the spread syntax.
const user = {
    'name': 'Alex',
    'address': '15th Park Avenue',
    'age': 43
}

// Add a new property salary
const updatedUser = {...user, salary:12345}; // {name: "Alex", address: "15th Park Avenue", age: 43, salary: 12345}

// Original object is unchanged
console.log(user); // {name: "Alex", address: "15th Park Avenue", age: 43}
Update Properties
We can also update an existing property value using the spread syntax. Like the add operation, the update takes place on the object's cloned instance, not on the actual object.
In the example below, we are updating the value of the age property:
const user = {
    'name': 'Alex',
    'address': '15th Park Avenue',
    'age': 43
}

const updatedUser = {...user, age:56}; // {name: "Alex", address: "15th Park Avenue", age: 56}

console.log(user); // {name: "Alex", address: "15th Park Avenue", age: 43}
Update Nested Objects
As we have seen, updating an object with the spread syntax is easy, and it doesn't mutate the original object. However, it can be a bit tricky when you try to update a nested object using the spread syntax. Let's understand it with an example.
We have a user object with a property department. The value of the department property is an object which has another nested object with its address property.
const user = {
    'name': 'Alex',
    'address': '15th Park Avenue',
    'age': 43,
    'department':{
        'name': 'Sales',
        'Shift': 'Morning',
        'address': {
            'city': 'Bangalore',
            'street': '7th Residency Rd',
            'zip': 560001
        }
    }
}
Now, how can we add a new property called, number with a value of, say, 7 for the department object? Well, we might try out the following code to achieve it (but that would be a mistake):
const updated = {
    ...user,
    department: {'number': 7}
}

console.log(updated);
As you execute it, you will realize that the code will replace the entire department object with the new value as, {'number': 7}. This is not what we wanted!

How do we fix that? We need to spread the properties of the nested object as well as add/update it. Here is the correct syntax that will add a new property number with the value 7 to the department object without replacing its value:
const updated = {
    ...user,
    department: {
        ...user.department,
        'number': 7
    }
};

console.log(updated);
The output is the following:

Combine (or Merge) two Objects
The last practical use of the spread syntax in JavaScript objects is to combine or merge two objects. obj_1 and obj_2 can be merged together using the following syntax:
const merged = {...obj_1, ...obj_2};Note that this way of merging performs a shallow merge. This means that if there is a common property between both the objects, the property value of obj_2 will replace the property value of obj_1 in the merged object.
Let's take the user and department objects to combine (or merge) them together.
const user = {
    'name': 'Alex',
    'address': '15th Park Avenue',
    'age': 43
}

const department = {
    'id': '001',
    'Shift': 'Morning'
}
Merge the objects using the spread syntax, like this:
const completeDetails = {...user, ...department};

console.log(completeDetails);
The output will be the following:

If we change the department object like this:
const department = {
    'name': 'Sales',
    'Shift': 'Morning'
}
Now try to combine them and observe the combined object output:
const completeDetails = {...user, ...department};

console.log(completeDetails);
The output will be:

The name property value of the user object is replaced by the name property value of the department object in the merged object output. So be careful of using it this way.
As of now, you need to implement the deep-merge of objects by yourself or make use of a library like lodash to accomplish it.
The Rest Parameter in JavaScript
The Rest parameter is kind of opposite to the spread syntax. While spread syntax helps expand or spread elements and properties, the rest parameter helps collect them together.
In the case of objects, the rest parameter is mostly used with destructuring syntax to consolidate the remaining properties in a new object you're working with.
Let's look at an example of the following user object:
const user = {
    'name': 'Alex',
    'address': '15th Park Avenue',
    'age': 43
}
We know how to destructure the age property to create a variable and assign the value of it. How about creating another object at the same time with the remaining properties of the user object? Here you go:
const {age, ...rest} = user;
console.log(age, rest);
The output will be:

In the output we see that the age value is 43. The rest parameter consolidated the rest of the user object properties, name and address, in a separate object.
In Summary
To summarize,
- Object destructuring is new syntax introduced in ES6. It helps create variables by extracting the object's properties in a much simpler way.
- If you are working with (or planning to use) a framework/library like
angular,react, orvue, you will be using a lot of object destructuring syntax. - Object destructuring and Spread syntax are not the same thing.
Spreadsyntax (also known as the Spread Operator) is used to copy the enumerable properties of an object to create a clone of it. We can also update an object or merge with another object using the spread syntax.- The
Restparameter is kind of the opposite of theSpreadsyntax. It helps to consolidate (or collect) the remaining object properties into a new object while destructuring is done.
Before we go
I hope you've found this article insightful, and that it helps you start using these concepts more effectively. Let's connect. You will find me active on Twitter (@tapasadhikary). Please feel free to give a follow.
You can find all the source code examples used in this article in my GitHub repository - js-tips-tricks. Are you interested in doing some hands-on coding based on what we have learned so far? Please have a look at the quiz here, and you may find it interesting.
You may also like these articles: